
Ballard carries several beautiful sheets of Decorative Wrap paper. Personally they are too small to really wrap anything with but for the $4.50 price tag they got my mind racing! I found 2 great maps in 2 different color schemes and have been holding onto them for the last 3 months or so just waiting to finally make something worthwhile happen to them! Ironically - I had been storing these in the spare room which will shortly be transformed into the new baby room and when I brought in the fabric swatches found that the Rome print was a perfect fit to use in my little girls room! Since we still have so much work to do I am holding off on that one for now so off to work I went on the other one for use in our Living Room.
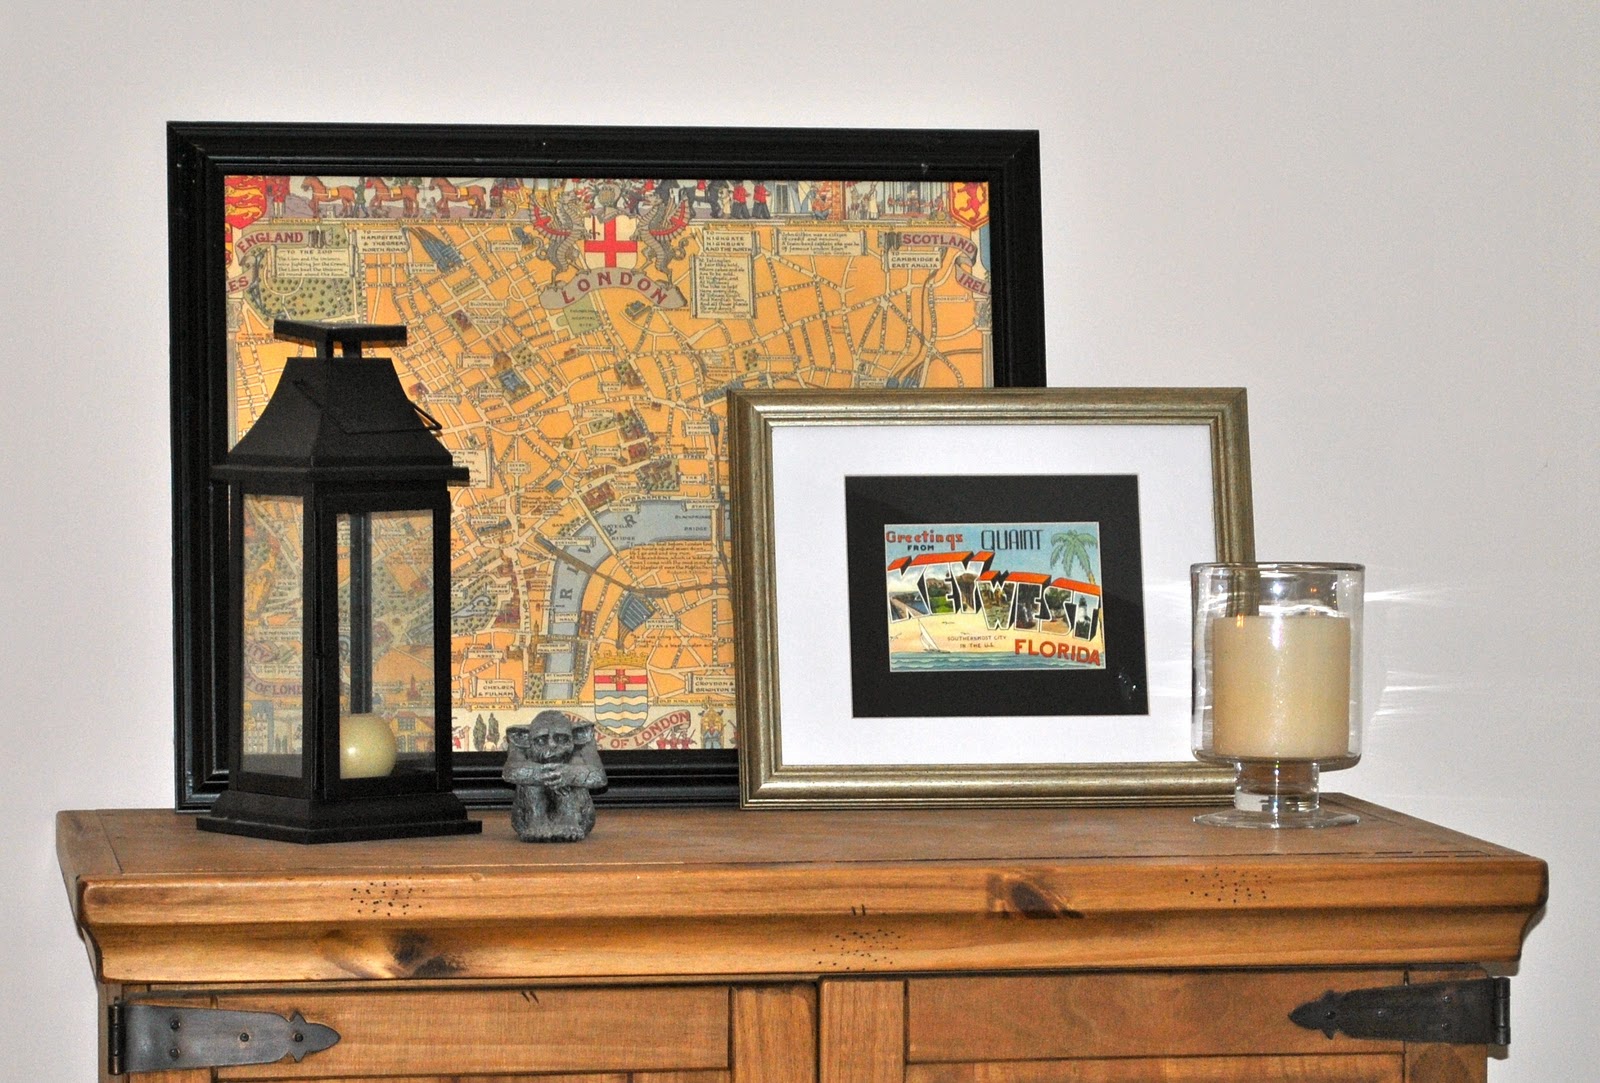
It is a golden yellow vintage looking map (seen below) with lots of muted reds, greens, and grays which was a great fit with our Living Room color scheme.

I had picked up a frame many years ago from Marshalls or TJ Maxx with the obligatory vintage looking champagne ad with the main color being a deep red. The actual frame was just a plain black frame about 22 x 30 inches which was a near perfect fit for the paper. Somehow I did not take pics of any the steps but they are so easy that anyone could replicate easily! I basically opened the back of the frame using a flat head screwdriver to push back the staples that were holding the backing to the frame. I was surprised to find that the print was actually printed directly onto the backing. This would explain why it was such a steal... not the best quality! I centered the now removed backing over my Decorative paper and traced a line in pencil so that I would know where I needed to cut the paper. I only had to trim about an inch from each of the sides so this was the perfect frame size to use, any bigger would have required a mat to be added. A quick wipe of the frame and glass with cleaner and I was ready to reassemble! I popped the paper on top of the backing and put it all back together! I used the flat head screwdriver to push the staples back down to hold the backing in place and Voila! In less than 5 minutes I had a beautifully frames vintage map for less than $5! I am super excited to try something a little more involved with the Rome one like maybe a wrapped map art like the Nester did here http://www.thenester.com/2011/04/how-to-make-map-art.html
I added the map on top of the closest thing we have to a mantel, a huge armoire that is a main focus when you walk into our living room. Along with another DIY framed art piece (using a friends Key West destination wedding invite) and some odd pieces that I had scattered in other rooms of the house, I am now happy to see what was a blank space now looking a bit more finished.... now if only we could get a coat of paint on these boring white walls!

No comments:
Post a Comment