
But looking around for something to accommodate this had me quickly realize that again my champagne taste would hard to find on a beer budget! So I scoured the house... Nothing to report unless I would be stealing a basket from another location where it was actually needed. So I ventured into dangerous territory, the garage. And as luck would have it, I found just what I had been looking for.
Open storage, compact, and not currently in use! But this would need some work before it came back into the house (much less into my little girls room!)

What they look like new!

Here she is in all her glory before... with a little bit of sanding!

And after a coat of spray on primer.

S&L Hydrangea paint

After two coats of S&L Hydrangea paint.
Unfortunately, the paint was a sample and it was a stretch to coat the outside after using it in several other places in Fia's room. This left me with a pretty storage box on the outside and an old, scratched inside with no lid. So what now?

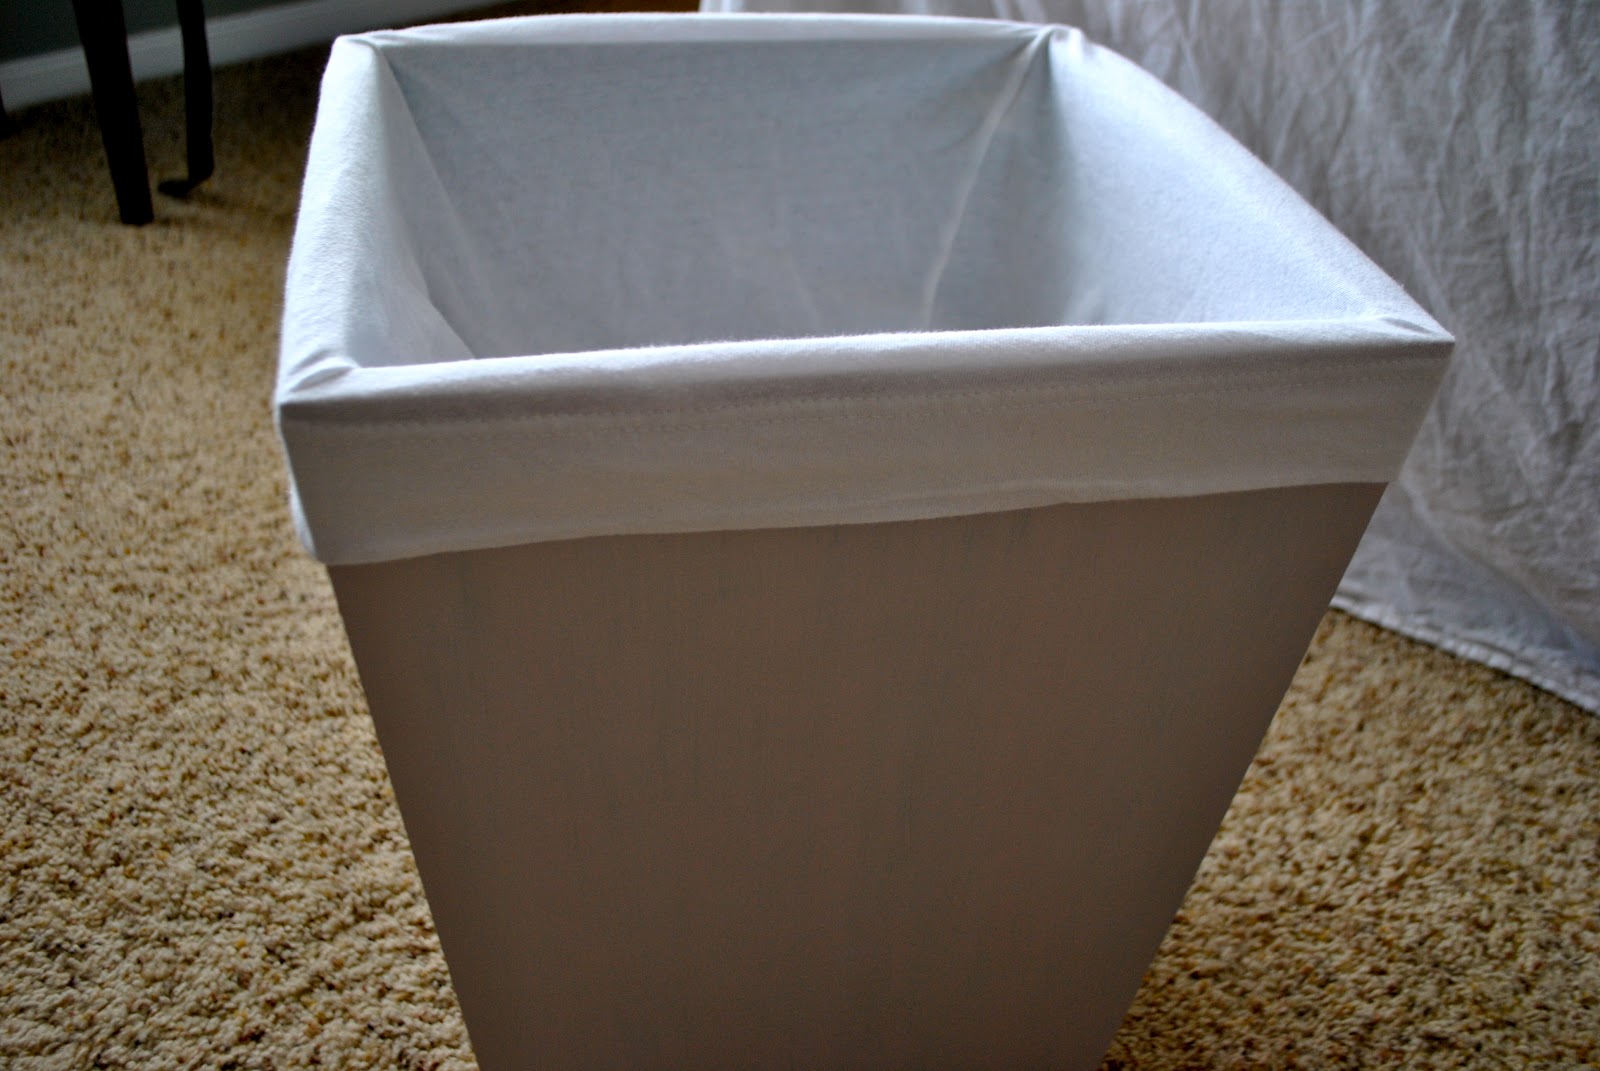
Looking at my half finished project it hit me. A liner would be the perfect fix! So I jumped online and found lots of options but at + $12 for nearly every one (plus at least a few days ship time) I knew that wasn't going to work for me. So I checked around the house... I had resigned myself to sewing one if I could find some extra white fabric. As I was checking our linen closet, something small and white fell from one of the shelves. Duh! Why would I sew something when I had just what I needed ready and waiting to be used. A pillow case!!!
Armed with a clean, regular sized white jersey pillow case I set off with fingers crossed. And what do you know? A perfect fit! I turned it inside out and folded the pillow case over the top of the storage cube right where the seam is.

I stuffed a pillow filler into the bottom of the cube (before adding the pillow case)
so the toys were up higher and more visible!
All finished and ready to be filled!
I love how this turned out and how easy it is to clean up her toys now too! Check it out all filled up and in her room!


I know that its impossible to tell from this shot - but the little lady is a mess today thanks to her teeth... note the drool and teething toy... but she loves her new toy storage!

No comments:
Post a Comment