Showing posts with label Lighting. Show all posts

Thursday, May 9, 2013

DIY Pottery Barn Rope Chandelier

I love me some Pottery Barn.. especially their lighting! But I do not love their prices. So what's a girl to do? Obviously a DIY knock off project to get the look without the big price tag! And the perfect DIY to link up with The Happy Hour Inspiration Link Party and Serenity Now!

While flipping thru a recent PB catalog, I saw the Rope Chandelier with Jute Shades and it was love at first sight (until I saw the $299 price). Check out the views of it below. Beautiful right? I love the texture of the rope and how casual it feels! And don't even get me started on that table...


After a closer look at the pictures, the shape of the chandelier was almost identical to the builder basic one that we just took down in our dining room. I began to wonder if I could really just wrap rope around our old chandelier to make it look like the PB one? 


Supplies:
Old Chandelier
4 bags of Everbilt Manila Rope from HD
Glue Gun
Scissors
Embroidery Hoop
Chandelier Shades

Let me apologize in advance that there are hardly any pictures of how I did this... between the splinters from the rope and the burns from the glue gun, I just wanted to quickly finish off this project and busting out the camera would have really slowed me down.

This chandelier was gathering dust in the garage for a month or so before this project. I removed all of the glass shades and lightbulbs and then got to work. There was no real rhyme or reason to where I started or how I wrapped the rope. I put a dot of hot glue on the chandelier and just started wrapping....


And wrapping....


And wrapping.....


After 5 whole days of working on this project during naps and in the evenings, I was finished with the rope wrapping of the chandelier! Thankfully, the last step was so easy compared to the winding of the rope all around the curves of the chandelier. I took a wooden embroidery hoop, cut it down to fit the width of my chandelier, and then wrapped it with the rope too. I argued with myself on leaving the chandelier as is or adding the hoop but I think that the hoop really completes the look! I need a serious break from the hot glue gun but I love the way that it turned out!

I found 2 chandelier shade options to try. Hobby Lobby was up first. These were the right color but I did not like the pleating on them. Apologies on the night time picture but I was just so excited to get them on that I could not wait! You can't beat Hobby Lobby prices, it was $30 for all 5 of the shades.


Next it was the Lowe's option. These were a bit bigger and the right shape but stark white. They were marked down to $4.99 each so also a great deal at just under $30 for all 5. The Lowe's shades seem to be a better fit in my eyes. Although I am super annoyed with the clip on shades. Its a daily struggle to keep them straight! But I have never seen any other options. Have yall? I am thinking that if I keep the Lowe's ones I will give them a coat of paint in a more natural color. It was so easy for the DIY Painted shades that this would be a piece of cake for the tiny shades!


But in the meantime, here is the finished product for now...


And a quick side by side comparison with my inspiration image.

Thursday, May 2, 2013

Jute Trimmed Lampshades

I finally found the perfect finishing touch to my lovely cobalt blue lamps with the painted shades. I argued with keeping the coral trim and even tried another color trim... but in the end the neutral won out!

It was a super easy DIY (my favorite kind!) that I literally completed in 5 minutes. I just had to pull off the existing coral trim and hot glue on the new jute ribbon. And voila ~ Totally new lampshade! An added bonus was that the coral trim was able to be reused for another project that will be seen very soon for the playroom.


I am beyond thrilled at how they turned out! And as you might be able to guess... they are no longer living in my Master Bedroom.  I found a much better home for them that is 2 quick projects away from a full reveal! Any guesses what room they ended up in?

Thursday, April 18, 2013

Lighting Love: Painted Lampshades

As my Master inspiration was falling apart, I started to really struggle to figure out where to go next. I knew that the Ink Trellis cases would be staying so when I saw these beautiful cobalt blue Threshold lamps at Target for $20, I ran like a mad woman to put them in my cart! They are short and wide which works great on our dresser and doesn't block the TV.


I adored the Ikat shades on them and was thisclose to bringing them home with me but I just couldn't commit since I am still so up in the air on the colors. I took the lamp bases home alone and thought that I would try to figure out what to do next. I happened to try out a few of the shades that I have floating around my house and I just loved the way a white shade looked against the blue. So back to Target I went to get some basic white drum shades.

We all know that a trip to Target for one thing inevitably means we get six times as much stuff and you never get what you went for in the first place! I could not refuse a browse down the sale aisle and I found these Threshold coral trimmed medium sized drum shades for $5 each! I suddenly had a stroke of genius! These would be perfect for my blue lamps.


I opted to try something a little different than the usual method of recovering a lampshade.... I decided to try paint! I happened to have a sample of Matte white paint from Home Depot and I used a small art paint brush. Not only did it cover with just one coat, it looks like a beautiful white linen fabric now! In less than an hour, I had 2 white lampshades with coral trim! 


Now the big question is whether the coral will stay in the room or not. I have another thought about taking this DIY to the next level. It all depends of the accent color for the Master. But that's another post for another day!

Linking up at Inspiration Gallery Link Happy Hour Party and Serenity Now

Thursday, April 4, 2013

Lighting Love.... more to come!

I am still trying to recover from the non stop party that was last week and weekend.... I have been working like crazy on some fun things too but they aren't quite finished. So here is a little sneak peak!


I also just pinned these inspiration images! Can you tell that lighting has been majorly on my mind??? 


Tuesday, March 19, 2013

Some tough decisions in the Master...

Once I got my inspiration  for my master, things started moving quickly! To refresh your memory...


The desk got moved in,  I was starting to look at paint, and I quickly ordered the shams Dwell Studio Magnus Kelly shams and the Ink Knotted Trellis pillow cases. I was so excited to get them that I had them shipped to my moms house since it would be torture to wait a whole 3 weeks to see them! They arrived before I even got there and my mom reported back that they were beautiful! I was a little concerned that the Ink cases might be more of a navy but they were a very dark gray that could read navy or black. Even better than black!

I then set off to find the embroidered duvet. The one in my inspiration board is from West Elm and no longer sold online but the sheets are still there for a great price. (I actually found the duvet in our local store but no shams are available ANYWHERE!) I was on Overstock ordering the kids snow suits and happened to do a search for embroidered duvet... I found several good options well under $70! I decided on the Scroll Embroidery set (below) in black based on excellent reviews (plus the scroll looked pretty similar to the Trellis design!) I shipped them straight to my mom's house too and then got the kids and myself packed up!


On my second night home, I finally got a chance to check out the goodies that had been delivered. The duvet was just as promised. Clean, crisp black stitching on a white slightly oversized king duvet with matching shams. It was all aligning perfectly. Until I opened the Dwell package. The shams and pillow cases were out of this world. Great quality, beautiful pattern and great thread count! They were just as pictured except one thing..... the background of both patterns was ivory! Maybe even ecru! Holding them up to the very white duvet I realized that it was not going to work with the duvet. I was sad and I started questioning what to do. I decided to return the duvet and bring the Dwell deliveries home to sort it out.

I started thinking about making my own Olatz inspired duvet like Jenny did here. But it seemed like it might be too much going on. So I threw the pillows on with my old duvet that is slightly off white. It's not horrible but it still bothers me! It is hard to tell in the photos but trust me when I say that there is a noticeable difference in shades. So now I am left wondering where to go from here? For now I am taking the night to soak it all in and see how I feel about it.


Ps - do you remember my striped lampshades that the movers dented? 
How awesome would they be in the master now?


Tuesday, February 12, 2013

Honey, I love this Honeycomb Light!

As you may recall, I found this amazing little chandelier a few weeks ago. I waffled back and forth on where it should go and ultimately decided that the dining room it was. I waited till a quiet Saturday, then bribed the hubs with a pizza lunch and he was happy to oblige! Because I bought the store model, there were no directions, screws, or even a box. Thankfully, I have a very resourceful husband with Siri on his iPhone and it all worked out okay!

So what do you think? I adore the crazy shadows that it casts when the light is turned on! 


Now that the light is in place, I am wondering about the mirror. I am all over the place on this room. So much I want to do and not sure where to go next! Maybe a rug?


I fell in love with the Ballard Braided Jute rug and after seeing that it was marked down crazy cheap (ummm... $210 for the 8x10 and $240 for the 9x12), I was thinking that might be the next step. Or would that rug be better suited in our family room? Tune in tomorrow when you finally get to see room 1 on the house tour! The family room!


Wednesday, January 30, 2013

Lighting Love

I have been of the hunt for a light fixture to upgrade from our boring basic builder's chandeliers. I have been very slow to pull the trigger because I am trying to take it slow and make sure I am getting something I really love (not to mention at a great price too!)

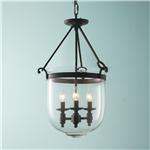
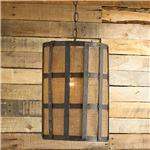
I am loving the look of the organic, vintage, farmhouse lanterns. And I adore these beautiful lights from Shades of Light! If only I had $500 to drop on one light fixture :(


And no post on dream lighting would ever be complete without me including my ultimate dream light fixture... Circa Lighting's Thomas O'Brien Hicks Pendant. A moment of silence please to enjoy this beautiful work of art!


Okay, back to reality! I got an email that World Market was having 30% off lighting plus an extra 15% for Explorer members. So, I packed up the kids and we headed out to check out some lights! Thankfully, my kiddos LOVE to shop and can easily be bribed with food! I had my eye peeled for a couple of the fixtures that caught my interest online and I was floored to see that the online pictures do nothing for the lights!

It was love at first sight for me... and the Honeycomb Chandelier!


I nabbed the very last one that the store had and it was actually the display! The chandelier is huge... like 2 feet across and 16 inches tall. It will make quite a statement piece and I adore that it's just so different. Oh yeah, and it was just shy of $100!

But I must say that I fell in like with one that isn't quite right for my style but would look awesome in many different settings. Check out this uber chic pendant! The shape was unique and the inside of the shade was a beautiful gold leaf. Yeah - go grab the Black Iron Bell Pendant today if you are looking for a clean mod look at a great price! It was %89 plus the 45% off!


So now the big question is.... where to put it? As we pulled into the house, Little Man excitedly asked if he could skip his nap and help me decide where our new 'light' should go! I love that little dude! I love the light so much that I really want it to go in the breakfast nook so I can see it daily but I know it would be perfect in the dining room as well.....

Wednesday, August 15, 2012

DIY Striped Lampshades

I have gone round and round trying to find the right lampshades for the Living Room. I was ecstatic to make and try the Dipped Paint Stick shades! And while they turned out great, they just weren't quite right for a more formal space and clashed with the bright emerald glass lamps and the Ikat drapes.


I had 2 solid white drum shades that I popped on in place of the paint stick shades and it looked much better. Such an improvement but they needed a little more 'wow'! With all of the other colors and patterns, I knew that I needed a neutral and something more on the classic side. You can't get more neutral and classic than a basic stripe!


Supplies:
2 White Drum Shades
9 yards of 1.5 inch Black Grosgrain Ribbon
Hot Glue
Scissors
Tape
Measuring Tape


Hot glue the ribbon along the bottom of the lampshade beginning with the seam. 

I started off using one long piece of ribbon but since my shades are slightly tapered the ribbon was gaping in places. I decided to use 3 shorter pieces of ribbon to eliminate this issue. I only glued the start and end pieces of the ribbon. No need to glue it all the way around.


The bottom stripe is successfully on! Hmmm.... this looks pretty. Should I stop here?


I taped on the other 2 stripes to see if I should stop or keep going. Loving the stripes! So back to adding the ribbon on the top and middle of the shade.


For the middle stripe, I took a tape measure to place it in the middle. I had 2 3/4 inches on the top and bottom of the ribbon for even placement. So I placed some tape around the shade at these measurements to keep the ribbon even as I glued it on.


I also taped the ribbon on before gluing it down just to be 100% sure it was even!


Above, adding another section of ribbon to keep it from gaping in the middle too. It worked best to place glue on the top section of the ribbon only and then go back and once flat glue down the bottoms.

Repeat the above process on shade number two....

And in less than an hour for less than $10......


And a shot with the drapes in the picture too. I love the pop of the shades!

I linked up at Hi Sugarplum! Thanks for hosting :)