Well - I am proud to say that I managed to get this piece 'finished' in less than a week's time! Sanding, priming, 3 coats of paint, and a clear coat... all completed while the hubby was out of town and I had both kids solo! Now that is a real challenge and I met it!
Unfortunately - I can't reveal anything just yet.
And here is why...
I spent the better part of my computer time last week searching for pulls to use on the dresser. I knew that I wanted brass and something large (6 inches or more). But I found nothing that really spoke to me at a reasonable price. I even checked locally at Lowe's and HD. Nothing quite big or wow enough. And for some reason I decided to check Restoration Hardware's sale section online. And what do you know that they have several pulls marked down to less than $7! I was nervous that these might be for the smaller sizes but I was pleasantly surprised when I clicked on the Duluth pull above and saw that the 8 inch Antique Brass pull was $6.99! Yes - this is still ALOT for pulls but not for this size and since I only need 4 of them I quickly added them to my cart (I am one of those people that worries about great online deals being snatched up if I don't buy quickly!) And in a few short days - they will be at my doorstep and it will be reveal time!
Saturday, June 9, 2012
Friday, June 8, 2012
One coat is on and I LOVE the color!!! Its a beautiful orangey red called Trolley from the Valspar Signature line at Lowes. Its shows a little bit brighter on my computer than in real life but I am loving it!
And for the actual view on the dresser.... drum roll please!!!!!
I am so excited to sand and put another coat on this to see a finished look! The one thing that is still alluding me are the perfect pulls. I am loving the look of a back plate but having a difficult time finding a back plate and pull in the same shade. Maybe I will just choose based on style and refinish if I need too!
I chose a Semi gloss outdoor paint in the hopes that it will hold up to the craziness of the kids and dog!
And for the actual view on the dresser.... drum roll please!!!!!
I am so excited to sand and put another coat on this to see a finished look! The one thing that is still alluding me are the perfect pulls. I am loving the look of a back plate but having a difficult time finding a back plate and pull in the same shade. Maybe I will just choose based on style and refinish if I need too!
Thursday, June 7, 2012
Primed and Ready for Fun!
So tonight was a great night.... both kids into bed by 8:15 and a nice dinner of chili that I made yesterday for no real clean up! That left me with plenty of time to get the dresser primed! I also had to remove a couple of the support pieces since we are taking out the top row of drawers. A rubber mallet and a furniture renovation are a great stress reliever!
I used the basic Zinsser Primer and was able to get on a quick coat in about 30 minutes after I sanded a couple of spots I had to come back to with the wood filler. So here is where we are as of right now... the real fun begins tomorrow with the first coat of paint! I am so excited to see how it looks!
On a side note - I was grabbing some neccesities at Target today when I happened upon 2 of these adorable baskets on the clearance aisles! Over a foot in diameter and 17 inches tall! Originally $39 and marked half off! Still alot for baskets but these are so big and I think that they will work perfect in the family room on either side of the dresser for some extra storage!
I used the basic Zinsser Primer and was able to get on a quick coat in about 30 minutes after I sanded a couple of spots I had to come back to with the wood filler. So here is where we are as of right now... the real fun begins tomorrow with the first coat of paint! I am so excited to see how it looks!
On a side note - I was grabbing some neccesities at Target today when I happened upon 2 of these adorable baskets on the clearance aisles! Over a foot in diameter and 17 inches tall! Originally $39 and marked half off! Still alot for baskets but these are so big and I think that they will work perfect in the family room on either side of the dresser for some extra storage!
Wednesday, June 6, 2012
Slow Progress...
Yesterday was a challenge to find much time to keep moving on the dresser... Baby Sissy had some of her 8 wk vaccinations on Monday and has been very unhappy since. So nap times have been unproductive for me. Thankfully - my sister and her daughter dropped by to play so Little Man was ecstatic!
Luckily once the kids finally got to bed around 9 last night I took a bit of time to get the piece all sanded down. No pictures as it looks the same just all smooth now. So today I am hoping to accomplish the priming and then I will be so close to trying out the paint!
I am so excited to FINALLY try something with a bright pop of color! I opted for the Valspar signature paint in semi gloss outdoor. But as I was sanding last night, I got that familiar feeling of doubt on whether I was making the right color choice. My first choice is really bold and vibrant! I did happen to grab a sample of a beautiful shade on navy called Indigo Streamer and I tried it on a test piece last night. I am so indecisive! A story that exemplifies this is that in high school - I was the girl with 2 prom dresses and literally decided the day before which one to wear!
Monday, June 4, 2012
For Real? Brass Drawer Pulls
Before I get started sanding, priming, and painting - I needed to decide if I will be using the existing pulls. From what I can gather they are solid brass so I decided to take a shot at polishing them and then make my decision. Since we are removing the top 3 drawers to house our TV components if one of them gets messed up in the process its okay.
I found a wealth of knowledge about brass pulls on this post by Centsational Girl. And based on the magnet test, it does appear that these are indeed real brass pulls.
I decided to take a shot at polishing them and then make my decision. Since we are removing the top 3 drawers to house our TV components if one of them gets messed up in the process its okay. Next it's time to start on the polishing and I decided to try the Brasso since I had to run to the store anyways and at $3.99 it seemed like a good idea. I opened it up and got to work. Here is what we started with...
Man is that stuff strong smelling!!! It literally knocked me back with the really strong smell! I let 3 of our six pulls sit in the solution for about 20 minutes and its amazing how much gunk it ate away. Here is where we are after the brief soaking.
The more that I look at the pulls though - I am leaning towards something a little bigger and maybe with a back plate so these bad boys are going to be retired! This means that I need to fill the existing holes so I got to work on that using my trusty tube of Wood Filler. Once it dries - its time to start sanding and then the priming! I am so excited to keep moving on this...
But what really is keeping me moving is that I bought the paint today so I am literally itching to see the finished product. Here is a clue as to what color I went with.
I found a wealth of knowledge about brass pulls on this post by Centsational Girl. And based on the magnet test, it does appear that these are indeed real brass pulls.
I decided to take a shot at polishing them and then make my decision. Since we are removing the top 3 drawers to house our TV components if one of them gets messed up in the process its okay. Next it's time to start on the polishing and I decided to try the Brasso since I had to run to the store anyways and at $3.99 it seemed like a good idea. I opened it up and got to work. Here is what we started with...
Man is that stuff strong smelling!!! It literally knocked me back with the really strong smell! I let 3 of our six pulls sit in the solution for about 20 minutes and its amazing how much gunk it ate away. Here is where we are after the brief soaking.
The more that I look at the pulls though - I am leaning towards something a little bigger and maybe with a back plate so these bad boys are going to be retired! This means that I need to fill the existing holes so I got to work on that using my trusty tube of Wood Filler. Once it dries - its time to start sanding and then the priming! I am so excited to keep moving on this...
But what really is keeping me moving is that I bought the paint today so I am literally itching to see the finished product. Here is a clue as to what color I went with.
Sunday, June 3, 2012
Six Day Restore Challenge
I am taking on a personal challenge this week.... Fingers crossed it goes well and that I get it completed by Friday!
We live in the best neighborhood and I love our neighbors! On the first day that we moved in - nearly the whole street was gathering in our neighbors garage for Friday Happy Hour. I mean how great is it to get out of the house, socialize, and have a drink? Even better to be able to walk 20 feet and do it at a moments notice with great people! On top of that - we have been very generously given 2 beautiful solid wood dressers as our neighbors are redecorating their home. The first now lives happily in my closet with a new coat of paint and the second one is now sitting in our garage waiting on its new attire!
I love the look of a brightly painted dresser turned entertainment system in a family room. Below are 2 images that really exemplify what I mean.
We live in the best neighborhood and I love our neighbors! On the first day that we moved in - nearly the whole street was gathering in our neighbors garage for Friday Happy Hour. I mean how great is it to get out of the house, socialize, and have a drink? Even better to be able to walk 20 feet and do it at a moments notice with great people! On top of that - we have been very generously given 2 beautiful solid wood dressers as our neighbors are redecorating their home. The first now lives happily in my closet with a new coat of paint and the second one is now sitting in our garage waiting on its new attire!
I love the look of a brightly painted dresser turned entertainment system in a family room. Below are 2 images that really exemplify what I mean.
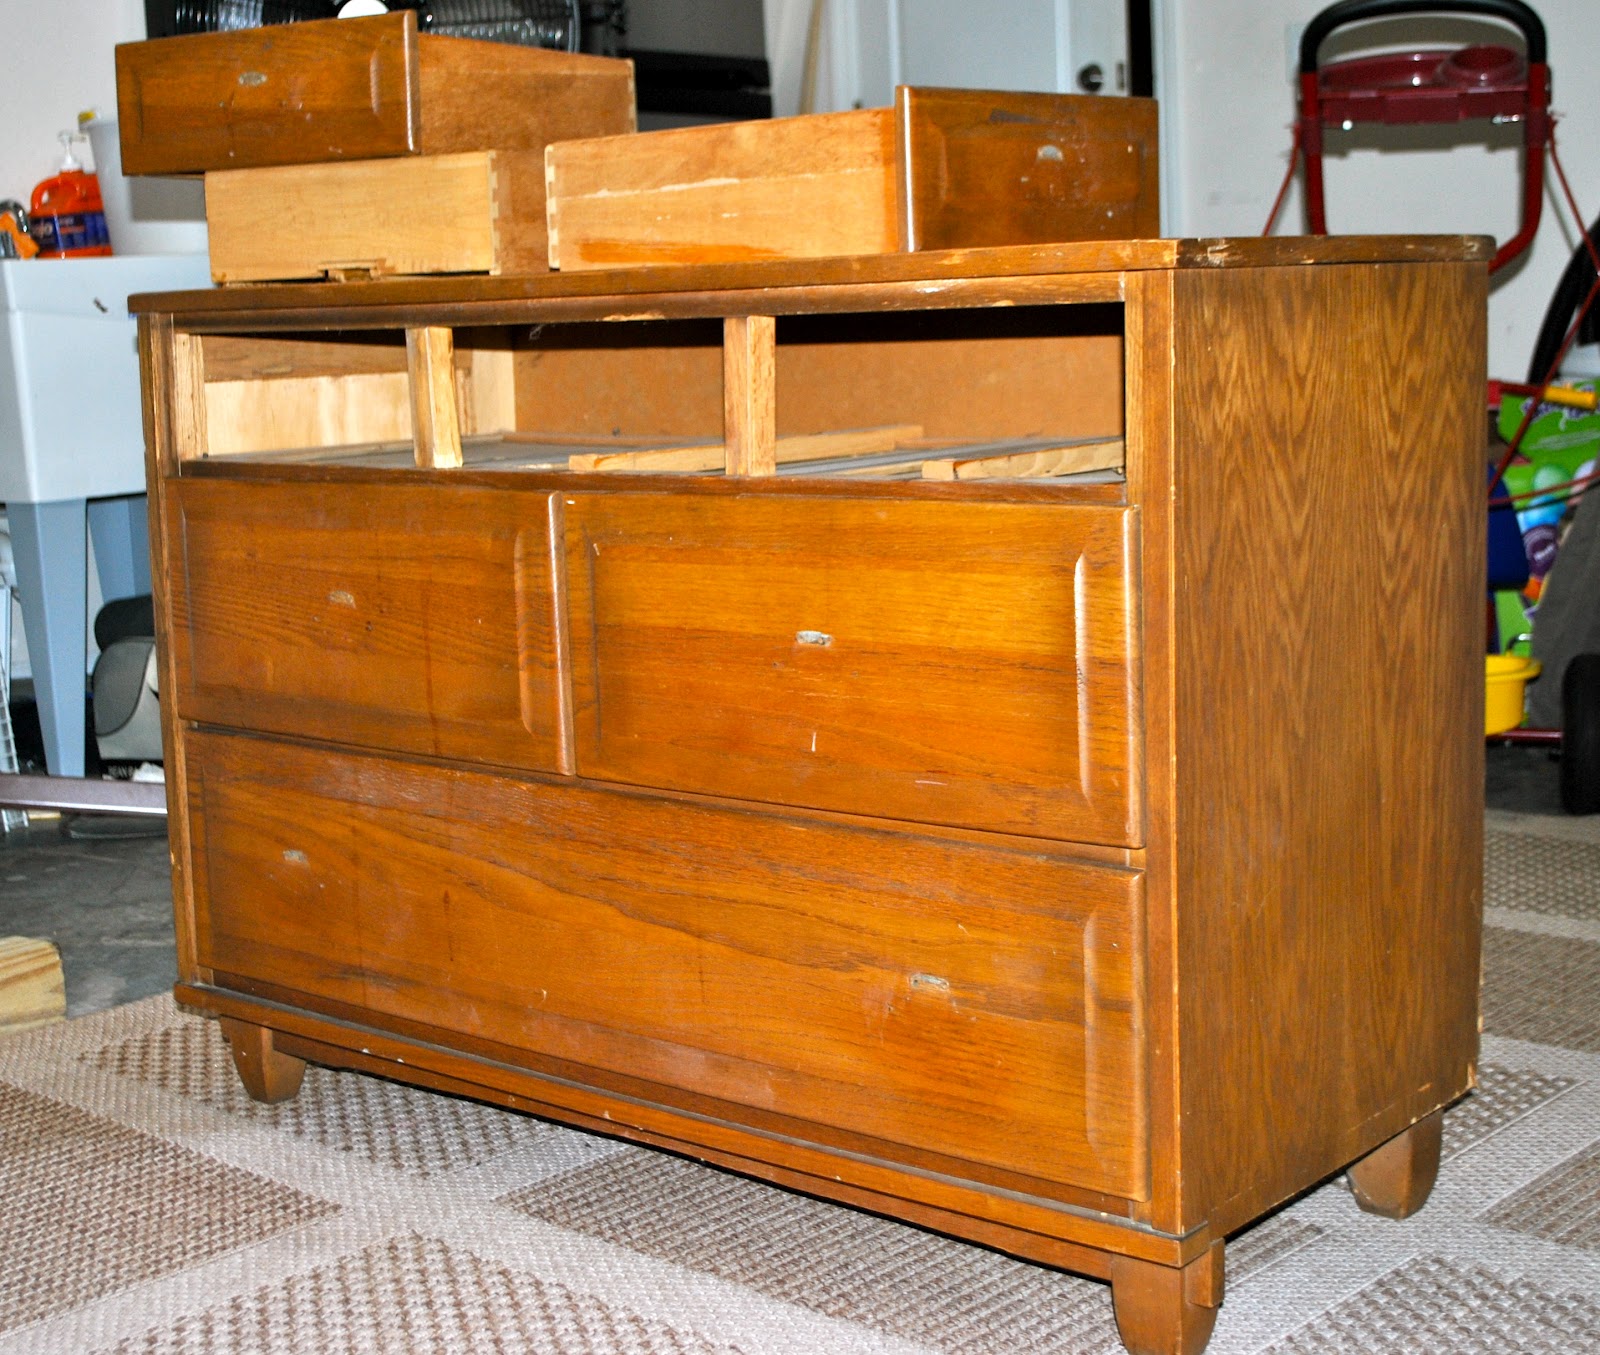
So this week, I am setting off on turning this solid wood dresser into an entertainment center! Here are the before pictures. Of course - we had already removed the pulls but at least I actually took some before ones this time! This is such a solid piece - and I am still trying to decide if I want to use the pulls or get new ones. First project for tomorrow is seeing what I can do about polishing them up!
Saturday, June 2, 2012
Shades of Grey... Display Idea
I was wondering thru Target recently and came upon some great sales. Our Target is adding the full grocery section and I guess that they needed to get rid of some of the home decor merchandise to make room! What a happy day for me (although I am pretty sure the checking account would disagree!)
An adorable little egg crate was just yelling my name from the shelf! I have seen these before at Anthro and love the idea of keeping yours eggs in these in the frig. The grey ones were marked down to $3.98 so I grabbed 2 and happily thought of how stylish my refrigerator would look! And then I recalled seeing these used to hold other things besides just eggs... office supplies at a desk, sewing odds and ends, and even jewelry! So I picked up 2 more and planned to spruce them up a bit to make them more suitable for display.
I have an unused can of Gray Chalkboard spray paint that has been burning a hole in my pocket and I decided this was the perfect piece for it. I love the idea of drawing on this or writing what goes in each section. So in the hour it took to paint and dry 2 coats of chalkboard paint I had this great little gift for less than $5!
Side Note: You will see that the chalk paint has the appearance of snake skin in the bottom of the egg crate... this is because I did not completely dry it prior to paining! Brilliant right? But I actually love the unexpected texture it gives to the matte black everywhere else. I am not sure if this happens with all spray paint but I am thinking about trying it out on the other one to see if I can create a crackled look all over.
An adorable little egg crate was just yelling my name from the shelf! I have seen these before at Anthro and love the idea of keeping yours eggs in these in the frig. The grey ones were marked down to $3.98 so I grabbed 2 and happily thought of how stylish my refrigerator would look! And then I recalled seeing these used to hold other things besides just eggs... office supplies at a desk, sewing odds and ends, and even jewelry! So I picked up 2 more and planned to spruce them up a bit to make them more suitable for display.
I have an unused can of Gray Chalkboard spray paint that has been burning a hole in my pocket and I decided this was the perfect piece for it. I love the idea of drawing on this or writing what goes in each section. So in the hour it took to paint and dry 2 coats of chalkboard paint I had this great little gift for less than $5!
Side Note: You will see that the chalk paint has the appearance of snake skin in the bottom of the egg crate... this is because I did not completely dry it prior to paining! Brilliant right? But I actually love the unexpected texture it gives to the matte black everywhere else. I am not sure if this happens with all spray paint but I am thinking about trying it out on the other one to see if I can create a crackled look all over.
Subscribe to:
Posts (Atom)