It's been a crazy month or so around our household! We sold our house (buyers put a contract on it sight unseen!), found a new house, hubs started his new job, moved out of our house solo, moved in with my parents for a few weeks, and finally last Friday closed on our new house!
I am in love with the area and our new home (minus these pesky few boxes that remain!)
Unfortunately, we are still lacking in the Internet department..... So until then I will remain MIA!

Showing posts with label Selling the House. Show all posts
Showing posts with label Selling the House. Show all posts
Tuesday, December 18, 2012

Sunday, November 18, 2012
A big week coming up...
We only know how to do things at one speed..... SUPER FAST! So tomorrow, the movers are coming and packing up the first house that the hubby and I purchased together and the only house that either of our kids have ever know. Then on Tuesday our stuff will be loaded up and shipped off to our new city!
It's very overwhelming but luckily it's happening so fast that I am not having a chance to get too sentimental. I do have plans to spend the next couple of weeks doing room by room tours on the blog of our now old house. We had some professional pictures done for the marketing of the house so it works out great to get one last view of everything!
And what then? Well, we found a house and I am beyond excited!!! So excited that in 3 short weeks, I will be decking the halls of our beautiful new home with garland and a Christmas Tree and..... I could go on forever!
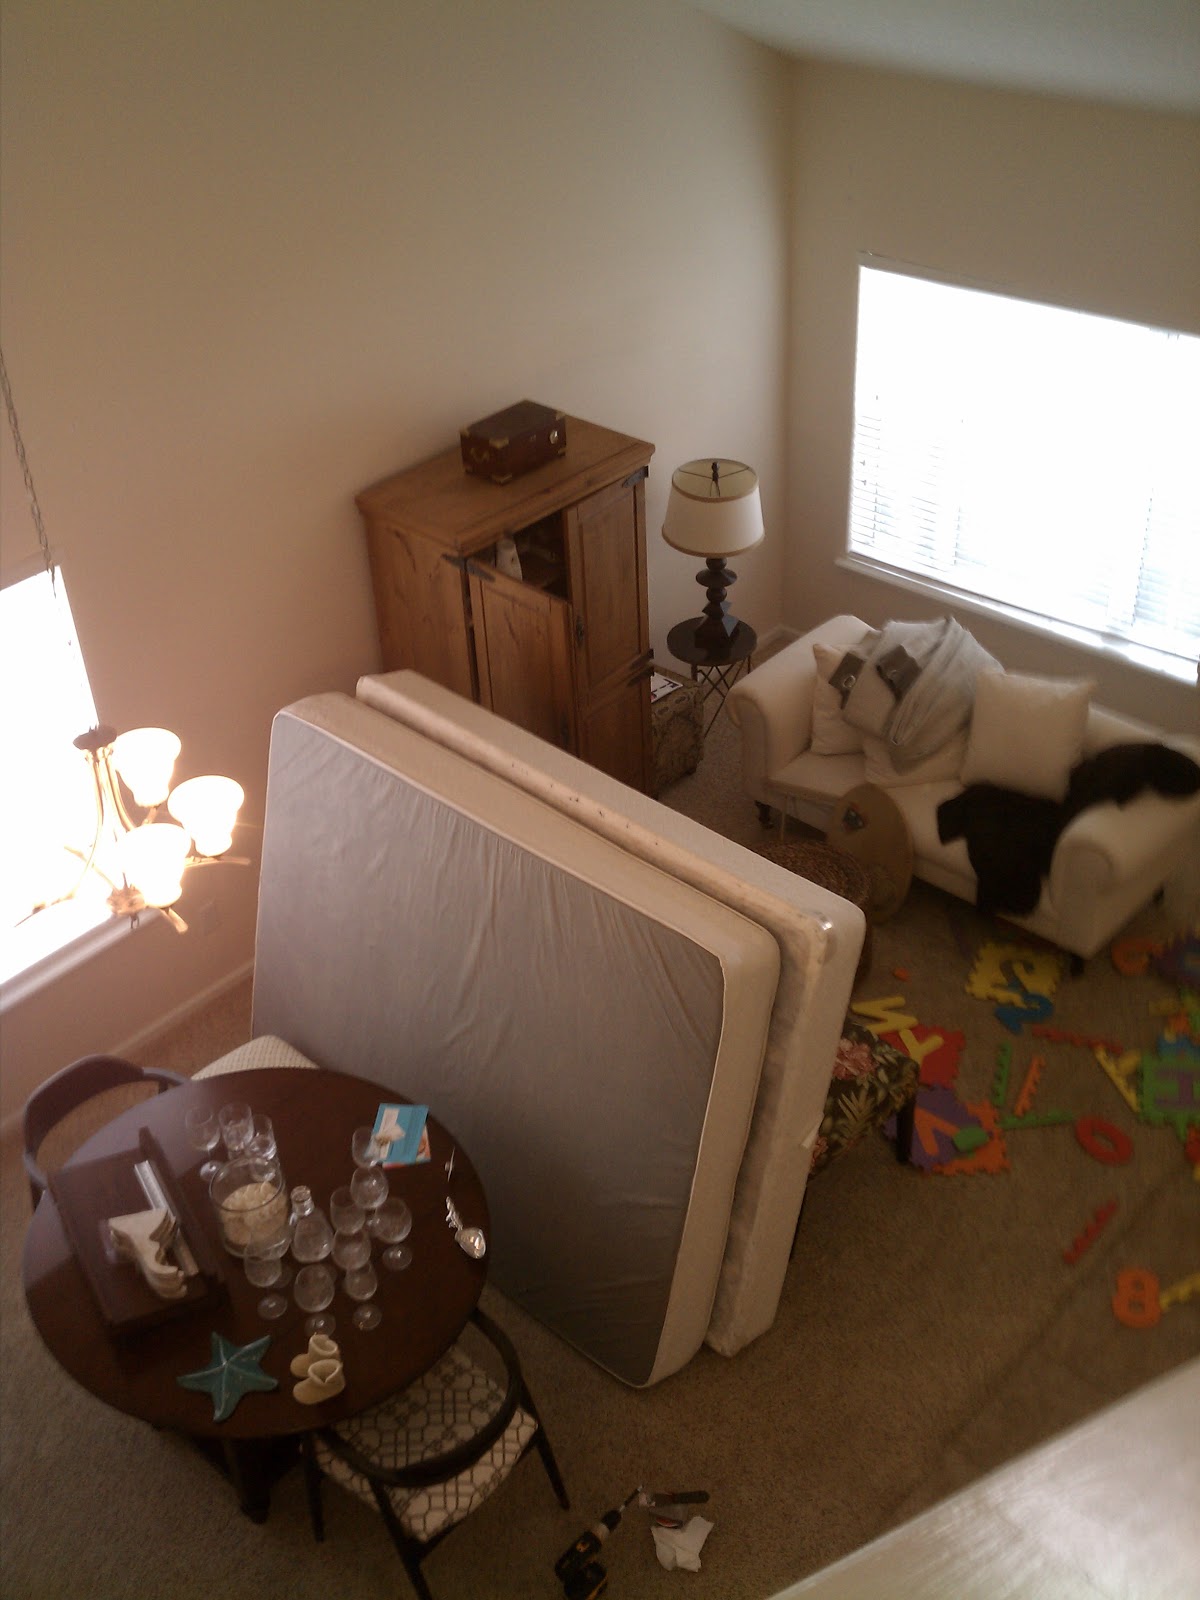
In the meantime, best return to this:

It's very overwhelming but luckily it's happening so fast that I am not having a chance to get too sentimental. I do have plans to spend the next couple of weeks doing room by room tours on the blog of our now old house. We had some professional pictures done for the marketing of the house so it works out great to get one last view of everything!
And what then? Well, we found a house and I am beyond excited!!! So excited that in 3 short weeks, I will be decking the halls of our beautiful new home with garland and a Christmas Tree and..... I could go on forever!
In the meantime, best return to this:
Friday, November 9, 2012
We have a new house!!! Just kidding....
Here I am another week passed and no blog posts! It makes me sad but I have come to grips with the fact that something had to give....
So what has happened since we last chatted? We took a quickie road trip to our new city, found an incredible house (that was way too big for us, but had the most beautiful hand scraped wood floors and built ins), had an accepted offer on the house, had a counter back on the house, a six hour car ride home with some very unhappy kids (thanks to missed naps to sign papers since we had an accepted offer), and then we decided against the house as it was starting to feel quite like a bait and switch..... in addition to inspections, moving plans, and general life. I literally wake up each morning and have no clue what day it is!
But I am taking a step back and enjoying this all! And unfortunately, blogging is taking a very back burner but it makes me a little less stressed having one less thing on my plate.
On the positive side, I see LOTS of design DIY in the very near future on our new house.... once we find it that is!
So what has happened since we last chatted? We took a quickie road trip to our new city, found an incredible house (that was way too big for us, but had the most beautiful hand scraped wood floors and built ins), had an accepted offer on the house, had a counter back on the house, a six hour car ride home with some very unhappy kids (thanks to missed naps to sign papers since we had an accepted offer), and then we decided against the house as it was starting to feel quite like a bait and switch..... in addition to inspections, moving plans, and general life. I literally wake up each morning and have no clue what day it is!
But I am taking a step back and enjoying this all! And unfortunately, blogging is taking a very back burner but it makes me a little less stressed having one less thing on my plate.
On the positive side, I see LOTS of design DIY in the very near future on our new house.... once we find it that is!
Saturday, October 27, 2012
Roping up a Quick Drapery DIY
One thing I have learned thru the process of selling our home is that things move fast. You get an hour of notice for a showing, you can get an offer in less than 3 days of being listed, and you can be back to square one, just as fast! So when my phone rang last night at 6pm (after a full day of no showings and letting the kids tear up our neat house) I fully expected a showing request for 7pm.... Thankfully, the call was for a showing in the am and I would be able to spend a little more than an hour getting the house cleaned. Aaaahhhhh! The small blessings in life!
I adore Little Mans room... But I have been aware that some parts of the room were making the room feel smaller. I had 3 tasks on my list to help the room look larger in the hour we had before bed time.
1. Down with roman shade. It was making the room look way too dark.
2. Out with the rocking chair and table. With 2 twin beds, the room was looking over crowded.
3. Take down the drapes over the closet. The dark navy was also making the room appear small.
The hubby made quick work of moving the chair out and I got started on removing the roman shade and drapery hardware from the closet. then, I popped the folding doors back on the closet. Things were starting to come together but the window really needed some help. I had planned on putting the drapery hardware from the closet back over the window (where I had removed it from just a few short months ago!) but with the window until bedtime quickly closing, I decided to improvise!
Here are some quick before shots:


1. Measure out the space that you need covered. For us, it was 2.5 inches down from the ceiling and 2.5 inches past the window. Mark your spots.
2. Screw the hooks into the wall. I chose to do 3 screws to ensure that it could hold up the fully lined black out drapes (they are really heavy!)

3. Stretch your rope out and knot it about an inch wider than the space you are looking to cover. This allows for the rope to slightly hang from the hooks. If you want more of a hang tie it wider, less of a hang tie it the exact length of the hooks.
4. Feed your drapes thru the rope and then wind the knots around the end hooks and thru the center hook.


And now for the after shots....
 The room feeling bigger and brighter without the shade.
 What a huge difference it made getting rid of the chair and bringing back the closet doors!
Linking up at Serenity Now.
I adore Little Mans room... But I have been aware that some parts of the room were making the room feel smaller. I had 3 tasks on my list to help the room look larger in the hour we had before bed time.
1. Down with roman shade. It was making the room look way too dark.
2. Out with the rocking chair and table. With 2 twin beds, the room was looking over crowded.
3. Take down the drapes over the closet. The dark navy was also making the room appear small.
The hubby made quick work of moving the chair out and I got started on removing the roman shade and drapery hardware from the closet. then, I popped the folding doors back on the closet. Things were starting to come together but the window really needed some help. I had planned on putting the drapery hardware from the closet back over the window (where I had removed it from just a few short months ago!) but with the window until bedtime quickly closing, I decided to improvise!
Here are some quick before shots:

View into the room with the roman shade

View towards the closet

Above the window after we got a little crazy with the Spackling! The big spots are from
patching up the hardware (and now I need hardware up again!)
Supplies:
Rope
Screw in Hooks
Tape Measure

1. Measure out the space that you need covered. For us, it was 2.5 inches down from the ceiling and 2.5 inches past the window. Mark your spots.
2. Screw the hooks into the wall. I chose to do 3 screws to ensure that it could hold up the fully lined black out drapes (they are really heavy!)

3. Stretch your rope out and knot it about an inch wider than the space you are looking to cover. This allows for the rope to slightly hang from the hooks. If you want more of a hang tie it wider, less of a hang tie it the exact length of the hooks.
4. Feed your drapes thru the rope and then wind the knots around the end hooks and thru the center hook.


And now for the after shots....


Linking up at Serenity Now.
Thursday, October 25, 2012
MIA....House on the Market & Sleep Regression
If you had asked me awhile ago how I thought things were going, you would get a very different answer than today! The house has been shown like crazy (we are talking almost daily), 2 offers (that both had finance issues), and my wonderful little sleepers are not so wonderful at sleeping right now! I fear the the sleep issues are a result of the schedule changes from showings. Naps have been skipped and bedtimes pushed back to allow the house to be shown at 1pm or at 7:30pm at night. It's been brutal all around and I am ready for it to be over! Did I mention that I am back to falling asleep within 2 minutes of sitting down? So I find myself waking up at about 4am after several hours of sleeping while sitting up in the rocker in Fia's room after her night time feed. Yeah - It's been great on the neck and back too!
No naps and late bedtimes also mean that get zero time to do any DIYs! Not that there is much I want to do in the way of Home DIYs. I have closed the book for this house and there will be no more money or time dropped here! Thankfully there are plenty of kids crafts and seasonal decorations that I can work on!
Tomorrow, I will debut a super cute and easy one kiddo kraft that can easily be switched up year round!
No naps and late bedtimes also mean that get zero time to do any DIYs! Not that there is much I want to do in the way of Home DIYs. I have closed the book for this house and there will be no more money or time dropped here! Thankfully there are plenty of kids crafts and seasonal decorations that I can work on!
Tomorrow, I will debut a super cute and easy one kiddo kraft that can easily be switched up year round!
Saturday, September 29, 2012
Where has the week gone?
Is it really Saturday? It's been another whirlwind week here and it's obvious that I've been super busy by my lack of postings! Poor Fiona's ear infection turned into a perforated eardrum, the house officially got put on the market Friday, and we had a photographer came in for the marketing materials. Oh and did I mention that hubby was in training all week? And that we had 3 showings on the first day on the market? A showing for us = loading both kids and the dog in the car to vacate for the hour window when the buyers will be here. On the positive side, we are keeping the house spotless!
It occurred to me on Thursday when the calls started coming in for showings that I needed to step it up a notch in regards to keeping track of when the showings are and everything in general from papers that need to be faxed, signed, etc. I have a calendar that I keep track of our family events and appointments that hangs in the play closet but it seems that we will be out and about ALOT as the house is on the market so I need something else.
Leave it to good old Target to come up with an affordable and super cute solution! Check out this super bright little notebook that was only $1.99! Initially I thought that I needed a calendar but decided that a notebook style would be best since I need to keep track of dates but also lots of other info!


And I can't pass up the clearance section! I love these 2 rolls of wrapping paper that were marked down to $2.19! Loving the bright colors and of course the great price!

It occurred to me on Thursday when the calls started coming in for showings that I needed to step it up a notch in regards to keeping track of when the showings are and everything in general from papers that need to be faxed, signed, etc. I have a calendar that I keep track of our family events and appointments that hangs in the play closet but it seems that we will be out and about ALOT as the house is on the market so I need something else.
Leave it to good old Target to come up with an affordable and super cute solution! Check out this super bright little notebook that was only $1.99! Initially I thought that I needed a calendar but decided that a notebook style would be best since I need to keep track of dates but also lots of other info!


And I can't pass up the clearance section! I love these 2 rolls of wrapping paper that were marked down to $2.19! Loving the bright colors and of course the great price!

Thursday, September 27, 2012
An Oldie... But a Goodie. Kitchen Part 1
Seeing as we are moving in the not so near future, it seemed fitting to look back at our first 'real' home project. Sure... We had painted, hung curtains, and done other small things to improve our home but this was a biggie! Best of all is my wonderful timing, this project would finish on the Friday before my son's blowout first birthday party with nearly 50 of our closest family and friends. Yeah... Not at all stressful!
I loved our house the first time we walked in (and it was actually the very first house that we looked at!) I loved the floor plan, the fenced nature view lot, the neutral color palette... The only thing that was a real deal breaker for me was the laminate counters not only in all of the bathrooms but also in the kitchen! I hated them! But I obviously knew that this was an easily remedied issue, so we got our dream house and planned to pick our perfect countertops when everything settled down. Two months after moving in, I was pregnant and then came baby, and before we knew it nearly 2 years had passed. We started discussing the kitchen renovation in January 2011 as we filed our taxes and were trying to decide where our tax money should go.
We ended up going with a smaller granite shop that gave us such a great price that we decided to go ahead and just do our 3 bathrooms as well! Then came the real fun.... Basically 4 projects rolled into one! I needed to make 4 sink, faucet, granite color, backsplash, and lighting choices at the same time! So I set off to make this all happen in our 30 day window.
The key for me was staying organized with all of the moving parts, including a general contractor, plumber, and more.
Using a pretty basic excel spreadsheet, I was able to not only stay organized but also stay on budget. We had a number for a budget that I really wanted to stay with and keeping it in excel allowed me to play with the numbers to make it happen. I started off with the costs that we knew for the granite, labor, etc. from there I worked my way down starting with the kitchen and filled in all the blanks knowing that sending more in one room meant that I would need to be more frugal in other places.
So on to the fun stuff.... I will start with the kitchen for today's post.
Our kitchen opens directly to our family room and breakfast nook. The kitchen island was two tiered and was nice to help separate the rooms but the bar on the island was less than ten inches deep which made it virtually unusable for eating or anything else for that matter! While visiting friends in Philly who fell in love with their one huge level island separating their kitchen and family room. There was so much usable space and the space seemed so open! We knew that it was now or never so we decided to just go for it! Our GC gave us a very reasonable estimate for the work and we were sold! The fun part of this was that our GC would need to chop down the second level of the island prior to the granite shop making templates. So had a few days of a somewhat non working kitchen. Pardon the dust, mess, and horrible counter tips!


The easiest choice of all for me was the backsplash. I had stumbled across a blog with the most beautiful kitchen tansformation and I knew right away that this was the tile for me... Off white subway style, with a crackle finish, and beveled edge. It was love at first sight and luckily a local tile store carried the brand so I was able get a sample of the available colors. I then soured the Internet and found a great price with super fast shipping on Fast Floors. Mark that off my list!
Chatting at the Sky - Backsplash Inspiration
Fast Floors Adex USA Hampton Bisque in the smaller mesh backed size
After many years of fighting with and hating my stainless steel sinks, I knew there had to be a better alternative. In an perfect kitchen world, a farmhouse sink would be where I would spend my evenings doing dishes. But I resigned myself to holding out for that sink in our dream house that we will one day build as I realized that switching to this style of sink would require reworking cabinets and a lot more money than I wanted to shell out! I stumbled upon the Blanco Silgranit sinks in several renovation blogs. They had amazing reviews and I thought that they could be a perfect fit. Another thing I learned was that when a sink is in an open island, going with a single basin sink helps to keep the view nice and clear even when there are a sink full of dirty dishes. The only catch? I need to see and feel something like a sink prior to choosing it. We lucked out that our local Ferguson Showroom had several samples of this composite sink and many more sink and faucet options!
Talk about heaven! An entire showroom full of sinks, faucets, lighting, mirrors, appliances.... The hubby and I made a full tour and to my surprise hubs loved the Silgranite Super Single Sink. But while I was in this amazing showroom I needed to make sure this was THE sink. A Kohler cast iron sink caught my eye on the way in and I needed to know more about it. Unfortunately, this beautiful sink in the color I wanted (Caviar) was a special order that would take 6-8 weeks and was also nearly $700! Yikes! This made up my mind and I again turned to the internet for 2 day shipping and another great deal on the Blanco Silgranite Anthracite (black) sink from Home Click. They were a great company to work with and even helped me locate my sink after hours when I was nervously stressing about getting it in time for our granite templates to be made. We ended up under $400 for the sink and the shipping charges!
Blanco Super Single in Brown (Anthracite seems to be out of stock)
(Side Note - I will admit that I was a little OCD with the sink and actually made a pit stop on the way to a friends wedding to buy one of these sinks for fear that the one we ordered online might in some way be damaged and would mess up our very tight timeline.)
While we were in Ferguson's I managed to drab the hubby into the faucet section too! We almost immediately agreed on a style that we loved but again the price nearly got us at well over $600! What??? So again I resigned to internet searching and found it substantially cheaper (plus we ordered all of our other faucets from them at an even bigger discount!)
Faucet Direct - Grohe Minta Stainless Faucet
And finally - it was all decided!!!! What a huge weight off my shoulders until it came to D-Day and I was like a kid on Christmas morning so excited to see it all together and praying that it would exceed my expectations... and it did!!!!


I loved our house the first time we walked in (and it was actually the very first house that we looked at!) I loved the floor plan, the fenced nature view lot, the neutral color palette... The only thing that was a real deal breaker for me was the laminate counters not only in all of the bathrooms but also in the kitchen! I hated them! But I obviously knew that this was an easily remedied issue, so we got our dream house and planned to pick our perfect countertops when everything settled down. Two months after moving in, I was pregnant and then came baby, and before we knew it nearly 2 years had passed. We started discussing the kitchen renovation in January 2011 as we filed our taxes and were trying to decide where our tax money should go.
We ended up going with a smaller granite shop that gave us such a great price that we decided to go ahead and just do our 3 bathrooms as well! Then came the real fun.... Basically 4 projects rolled into one! I needed to make 4 sink, faucet, granite color, backsplash, and lighting choices at the same time! So I set off to make this all happen in our 30 day window.
The key for me was staying organized with all of the moving parts, including a general contractor, plumber, and more.
Using a pretty basic excel spreadsheet, I was able to not only stay organized but also stay on budget. We had a number for a budget that I really wanted to stay with and keeping it in excel allowed me to play with the numbers to make it happen. I started off with the costs that we knew for the granite, labor, etc. from there I worked my way down starting with the kitchen and filled in all the blanks knowing that sending more in one room meant that I would need to be more frugal in other places.
So on to the fun stuff.... I will start with the kitchen for today's post.
Our kitchen opens directly to our family room and breakfast nook. The kitchen island was two tiered and was nice to help separate the rooms but the bar on the island was less than ten inches deep which made it virtually unusable for eating or anything else for that matter! While visiting friends in Philly who fell in love with their one huge level island separating their kitchen and family room. There was so much usable space and the space seemed so open! We knew that it was now or never so we decided to just go for it! Our GC gave us a very reasonable estimate for the work and we were sold! The fun part of this was that our GC would need to chop down the second level of the island prior to the granite shop making templates. So had a few days of a somewhat non working kitchen. Pardon the dust, mess, and horrible counter tips!


The easiest choice of all for me was the backsplash. I had stumbled across a blog with the most beautiful kitchen tansformation and I knew right away that this was the tile for me... Off white subway style, with a crackle finish, and beveled edge. It was love at first sight and luckily a local tile store carried the brand so I was able get a sample of the available colors. I then soured the Internet and found a great price with super fast shipping on Fast Floors. Mark that off my list!
Chatting at the Sky - Backsplash Inspiration
Fast Floors Adex USA Hampton Bisque in the smaller mesh backed size
After many years of fighting with and hating my stainless steel sinks, I knew there had to be a better alternative. In an perfect kitchen world, a farmhouse sink would be where I would spend my evenings doing dishes. But I resigned myself to holding out for that sink in our dream house that we will one day build as I realized that switching to this style of sink would require reworking cabinets and a lot more money than I wanted to shell out! I stumbled upon the Blanco Silgranit sinks in several renovation blogs. They had amazing reviews and I thought that they could be a perfect fit. Another thing I learned was that when a sink is in an open island, going with a single basin sink helps to keep the view nice and clear even when there are a sink full of dirty dishes. The only catch? I need to see and feel something like a sink prior to choosing it. We lucked out that our local Ferguson Showroom had several samples of this composite sink and many more sink and faucet options!
Talk about heaven! An entire showroom full of sinks, faucets, lighting, mirrors, appliances.... The hubby and I made a full tour and to my surprise hubs loved the Silgranite Super Single Sink. But while I was in this amazing showroom I needed to make sure this was THE sink. A Kohler cast iron sink caught my eye on the way in and I needed to know more about it. Unfortunately, this beautiful sink in the color I wanted (Caviar) was a special order that would take 6-8 weeks and was also nearly $700! Yikes! This made up my mind and I again turned to the internet for 2 day shipping and another great deal on the Blanco Silgranite Anthracite (black) sink from Home Click. They were a great company to work with and even helped me locate my sink after hours when I was nervously stressing about getting it in time for our granite templates to be made. We ended up under $400 for the sink and the shipping charges!
Blanco Super Single in Brown (Anthracite seems to be out of stock)
(Side Note - I will admit that I was a little OCD with the sink and actually made a pit stop on the way to a friends wedding to buy one of these sinks for fear that the one we ordered online might in some way be damaged and would mess up our very tight timeline.)
While we were in Ferguson's I managed to drab the hubby into the faucet section too! We almost immediately agreed on a style that we loved but again the price nearly got us at well over $600! What??? So again I resigned to internet searching and found it substantially cheaper (plus we ordered all of our other faucets from them at an even bigger discount!)
Faucet Direct - Grohe Minta Stainless Faucet
And finally - it was all decided!!!! What a huge weight off my shoulders until it came to D-Day and I was like a kid on Christmas morning so excited to see it all together and praying that it would exceed my expectations... and it did!!!!


And what the kitchen looks like today? Stayed tuned tomorrow!
Monday, September 24, 2012
Picture This... Tip 5
Happy Monday! I hope that everyone is got to spend some time with their families and friends this weekend. We had a nice weekend... yet we are still waiting on the kids to be 100%. It's wreaking havoc on my sleep!
I had every intention of finishing this little segment up over the weekend but the above mentioned lack of sleep deterred that from happening! This tip is a great one yet it's pretty hard for me to fully put into practice. I am sure that you will have the same problem.
When potential buyers walk into your home you want future buyers to be able to picture themselves in the house... to see their kids playing in the backyard, their furniture filling the house, and many happy meals being prepared in the kitchen and enjoyed around their table! This can be harder for potential buyers to do with your families smiling faces on every surface. I am by no means saying to get rid of EVERY picture in your home but taking some down can really help.
One place where this really worked for me was in the play room (aka the loft). The right top shelf housed about 8 different frames with family pictures. Below that to the right of the stereo is a 12 frame collage frame. So that's about 20 pictures in 2 feet of almost eye level space. Kind of a lot!

I went full force on this space and took them all down (it was also looking a bit cluttered!) I think that it helps make the space look cleaner and I hope that buyers will look at the wonderful play space instead of my explosion of family photos!


PS - One of the hot things to do when your home is on the market is to do a virtual tour online or have very elaborate shots of every room. After all online media is often the first time people will view your home. My mom had a great suggestion that especially for these pictures, make sure that the pictures are down or at least not visible in the final product. Think about it! Here is an online posting of your address and then you are attaching pictures of your family??? Another great suggestion was to skip the pictures in your kids rooms. Again we don't need everyone on the world wide web knowing the sex, ages, and often times your kiddos names! It's sad that we have to think like this but its always better to be safe than sorry!
I had every intention of finishing this little segment up over the weekend but the above mentioned lack of sleep deterred that from happening! This tip is a great one yet it's pretty hard for me to fully put into practice. I am sure that you will have the same problem.
When potential buyers walk into your home you want future buyers to be able to picture themselves in the house... to see their kids playing in the backyard, their furniture filling the house, and many happy meals being prepared in the kitchen and enjoyed around their table! This can be harder for potential buyers to do with your families smiling faces on every surface. I am by no means saying to get rid of EVERY picture in your home but taking some down can really help.
One place where this really worked for me was in the play room (aka the loft). The right top shelf housed about 8 different frames with family pictures. Below that to the right of the stereo is a 12 frame collage frame. So that's about 20 pictures in 2 feet of almost eye level space. Kind of a lot!

I went full force on this space and took them all down (it was also looking a bit cluttered!) I think that it helps make the space look cleaner and I hope that buyers will look at the wonderful play space instead of my explosion of family photos!


PS - One of the hot things to do when your home is on the market is to do a virtual tour online or have very elaborate shots of every room. After all online media is often the first time people will view your home. My mom had a great suggestion that especially for these pictures, make sure that the pictures are down or at least not visible in the final product. Think about it! Here is an online posting of your address and then you are attaching pictures of your family??? Another great suggestion was to skip the pictures in your kids rooms. Again we don't need everyone on the world wide web knowing the sex, ages, and often times your kiddos names! It's sad that we have to think like this but its always better to be safe than sorry!
Friday, September 21, 2012
Fix it with Furniture... Tip 4
Happy Friday! I am so excited for this week to be over and the weekend to begin! We have two birthday parties on Saturday which should equal a little extra am sleep on Sunday from Little Man.... fingers crossed!
I will admit that I LOVE furniture. I think it's a problem. I comb the stores looking for new pieces and when I gt home I think of how I can re-arrange the pieces I have to better suit the space and to allow for more to come home with me next time!
Once upon a time, a mommy got very tired of constantly seeing her kids toys spread across the house. This was before the idea of a play closet had even entered her brain....and she set out to find a way to keep the kids in her view while she was cooking in the kitchen and such without staring at Elmo, Mickey Mouse, and the like all day long. Enter a modern looking dark wood buffet with 2 shelves, 1 drawer, and 3 shelves hidden behind a door. Being that our family room is very deep, the sectional got moved forward, the buffet was placed on the back wall perfectly centered between the windows, and the kids got a long galley style play area that was not visible unless you walked to the back side of the couch!


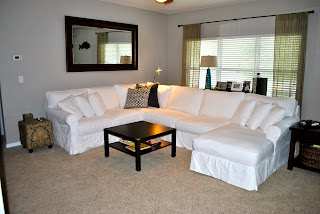 And with the white slipcovers on...


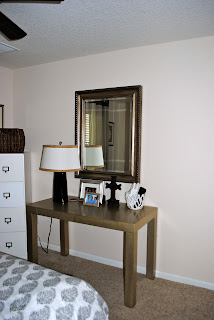
First things first, the file cabinet got moved to the closet. It fits perfectly under the adjustable wooden shelves we made and is still easily accessible! Note - the reams of fabric hiding in the closet too!

I adore the Parsons Desk but it is really too big for this space. It is also a very easy piece to store by just unscrewing the legs, it could be pushed under a bed. I said my goodbyes to the desk and moved the buffet into it's place. Such a better fit size wise! It also gives us a great location to quickly 'hide' stuff when a last minute showing is going to happen and the house is a disaster!


I am linking up today at Serenity Now!
I will admit that I LOVE furniture. I think it's a problem. I comb the stores looking for new pieces and when I gt home I think of how I can re-arrange the pieces I have to better suit the space and to allow for more to come home with me next time!
Once upon a time, a mommy got very tired of constantly seeing her kids toys spread across the house. This was before the idea of a play closet had even entered her brain....and she set out to find a way to keep the kids in her view while she was cooking in the kitchen and such without staring at Elmo, Mickey Mouse, and the like all day long. Enter a modern looking dark wood buffet with 2 shelves, 1 drawer, and 3 shelves hidden behind a door. Being that our family room is very deep, the sectional got moved forward, the buffet was placed on the back wall perfectly centered between the windows, and the kids got a long galley style play area that was not visible unless you walked to the back side of the couch!

View when you walk into the room...

and if you walk behind the sectional!


from another angle!
This plan worked great for us for quite some time! But once the play closet got up and running the buffet wasn't being used and it did take up ALOT of precious room! We moved the buffet, changed out the curtains (smart to do before the sectional move), and then pushed the sectional back to about 6 inches away from the wall. What a difference!!! The room looks huge again! We also moved the dark wood side table to the other side of the sectional and brought in a dark wood chest to use on the chaise side. I also brought down the 2 floor lamps that we used to have in the Master and placed those on each side of the sectional for some more accent lighting. Oh yes - and I took the bottom shelf off of the coffee table (and spray painted it a Hammered Bronze to cover up the mess I made a few nights ago!) What do you think?

Looking cleaner and so much bigger!!!
This left us with an extra piece of furniture to do something with.... and I knew right where it should go! The guest bedroom! The guest bedroom has a full size bed, the West Elm Parsons desk, and a tall file cabinet from Ballard (in addition to a variety of side tables that float in and out as nightstands). The room always ended up feeling really tight even with just those limited pieces.

when you walk in to the room...

The view from the bed...

I adore the Parsons Desk but it is really too big for this space. It is also a very easy piece to store by just unscrewing the legs, it could be pushed under a bed. I said my goodbyes to the desk and moved the buffet into it's place. Such a better fit size wise! It also gives us a great location to quickly 'hide' stuff when a last minute showing is going to happen and the house is a disaster!

view from the door
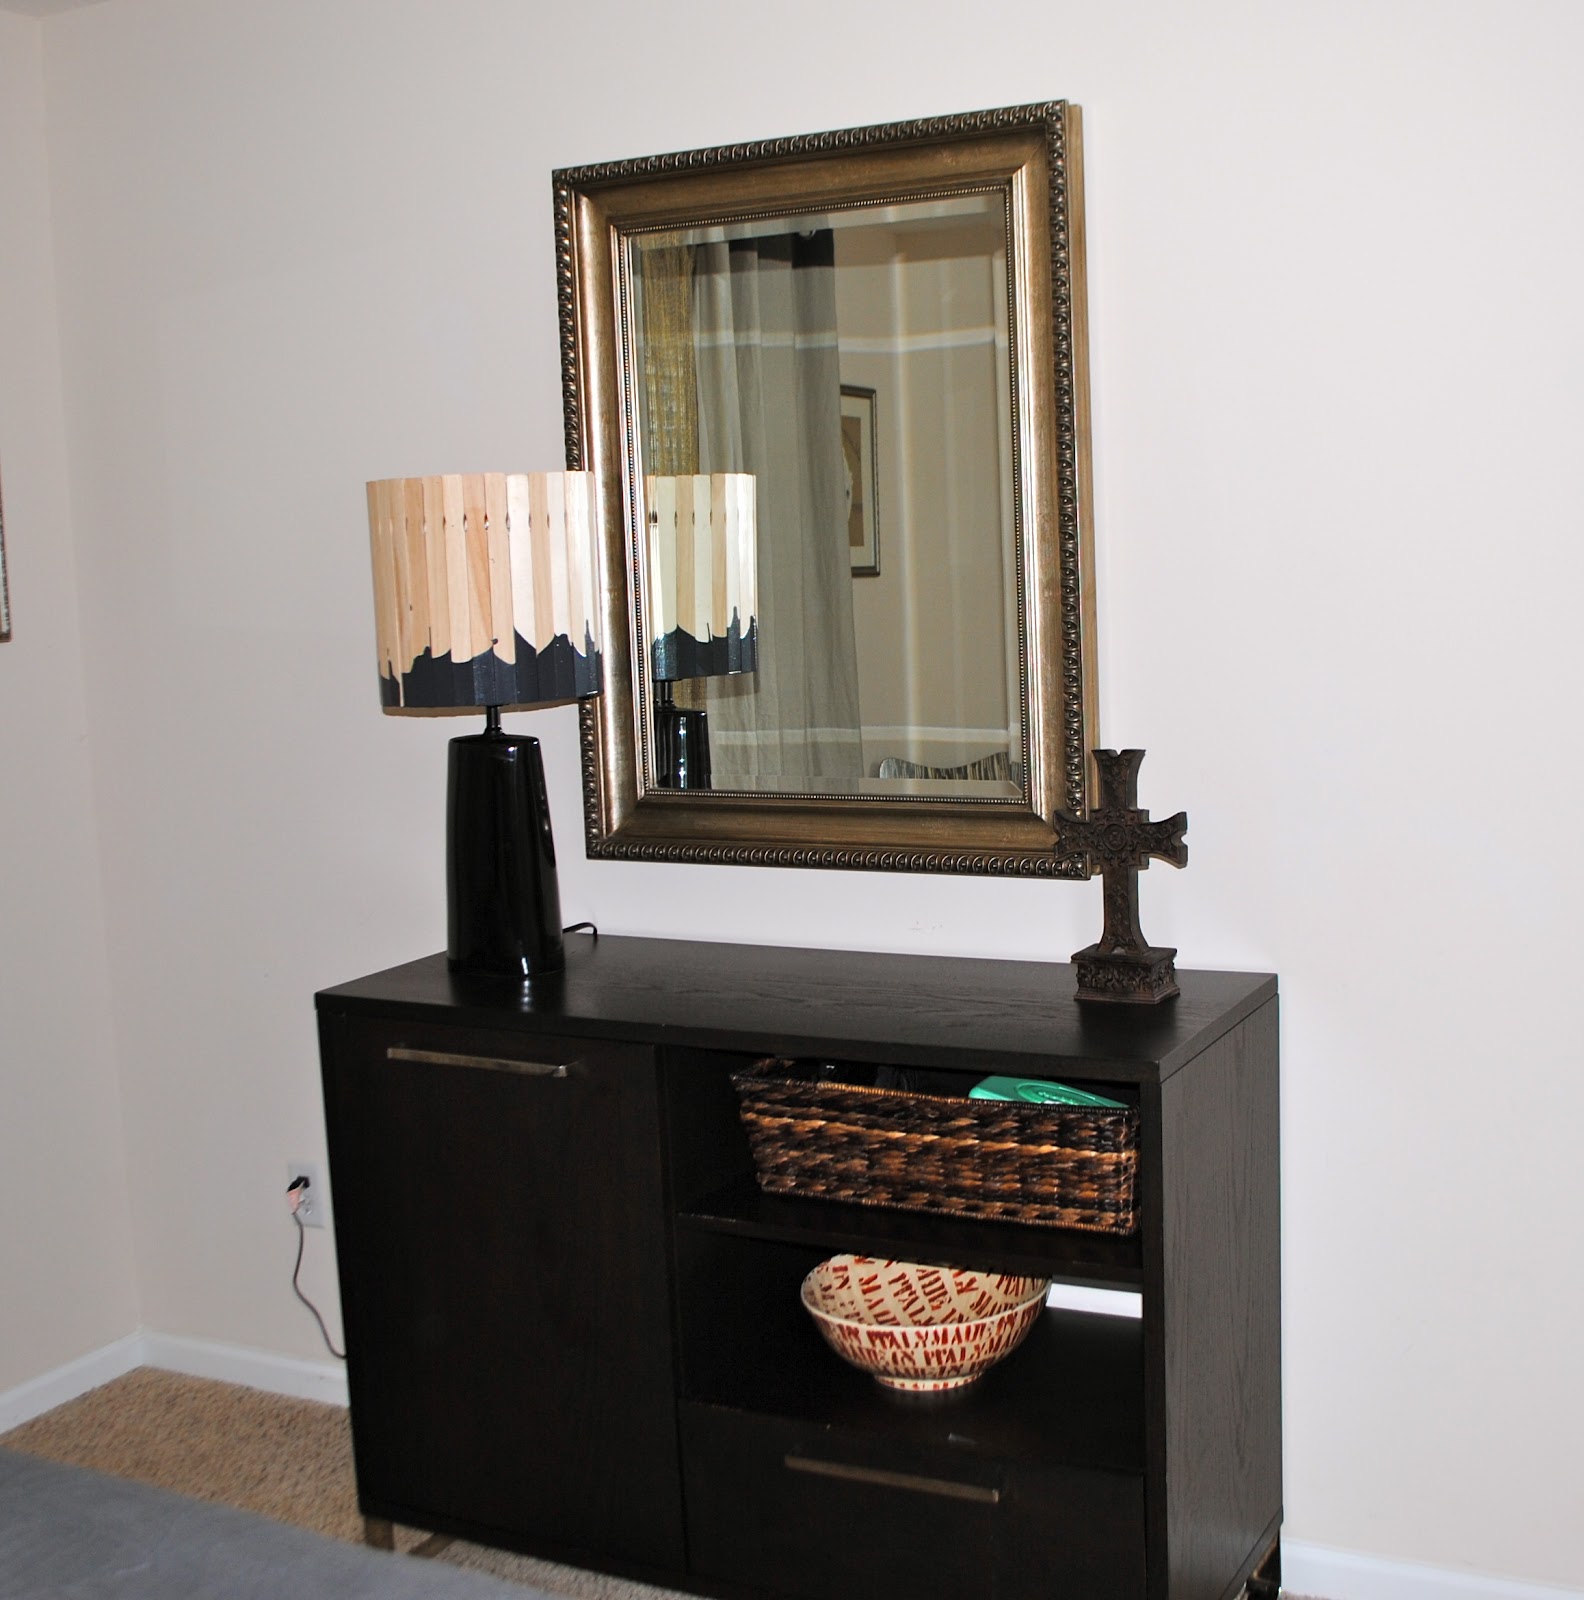
and from the bed... looking so much bigger!
PS - I hope these pictures have captured that placement really is everything! One last tip that has been a life saver for my back and my marriage... Moving Men sliders. These things allow you to move anything with almost no work! I have even used them on my solid wood armoire that I left totally full!
Thursday, September 20, 2012
Keep it Clutter Free...Tip 3
Today's tip is really a no-brainer! And again can be applied across your home (and in your life in general!)

In the living portion of the room, the biggest change came from removing all of the pictures and accessories from the top of the armoire. Then I moved the couch in front of the window and placed the slipper chairs at an angle. I brought in an old lamp to go on a side table next to the couch. A vintage looking coat/hat rack adds some height to the other side of the couch. The rack was previously in the breakfast nook and worked great to catch our bags, jackets, purses but it was such an eye sore all loaded up that we moved it and plan to keep it bare! To the right of the armoire we added a square ottoman in the same fabric as the Ballard panels in the Dining area. I like how it pulls the 2 spaces together (and hides the huge surge protector!)


PS - Don't forget to de-clutter the side of your frig, pantry, bathroom and kitchen counters, and even your shower shelves if they are visible! Having a de-cluttered house leaves potential buyers feeling that you have adequate space to store your possessions and that they will too!
Clutter is probably the fastest and easiest 'issue' to correct in your home. My mind quickly goes to that saying about accessories.... always look in the mirror before you leave home and remove one accessory for a more polished look. Same with the house... Styled and filled shelves are beautiful when looking at design, but when showing your home less is always more.
And to illustrate this I venture once more into our Great Room which is really the room you walk right into from our front door... so lots of pressure to start things off on the right foot! It is a large room meant to hold both a dining table and assorted living room furniture. It also has a great 2 story tall slanted ceiling which makes the room look even bigger! And of course, the beautiful stairway that just screams "Decorate me with garland for Christmas!"
We have our living room set up first and then the dining area further back. We don't use this space as a dining room unless we are having people over... 95% of the time the whole Great Room functions as our computer/craft/blogging area. This is what the room looked like most recently:


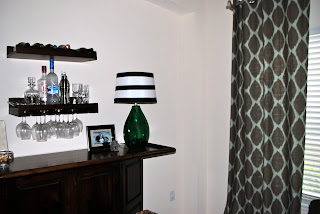
We started with the bar since it is the big focal point. I cleared everything off the actual bar and the bar shelves. I removed the liquor bottles from the bar shelves and tried to keep it looking simple and clean with a wooden humidor, glass decanter, and 2 sets of stacked glasses.
As for the bar, I was so sad to remove my most favorite lamps but I knew that it was the right thing to do (don't worry - they aren't gone for good!). I then put 3 small pieces on each side of the bar. I went with a picture, a candle in a glass hurricane, and a clock on one side and the M on the other.
And to better fit with the Ballard DIY drapes, I relocated the chairs that were around the table (of course no before of this so use your imagination!) and moved the open back mid century chairs around the table. A simple glass bowl filled with sand and coral finishes off the dining area.
And to illustrate this I venture once more into our Great Room which is really the room you walk right into from our front door... so lots of pressure to start things off on the right foot! It is a large room meant to hold both a dining table and assorted living room furniture. It also has a great 2 story tall slanted ceiling which makes the room look even bigger! And of course, the beautiful stairway that just screams "Decorate me with garland for Christmas!"
We have our living room set up first and then the dining area further back. We don't use this space as a dining room unless we are having people over... 95% of the time the whole Great Room functions as our computer/craft/blogging area. This is what the room looked like most recently:

DIY Striped Shades on the bar

West Elm Ikat drapes and right in front of the bar (barely visible) is the Pottery Barn Shane Table. Round and dropped leaf it is a great double duty piece that I have often used behind a couch like a console table.

Where the crafting/blogging happens when the doors are open!

Nice and neat when it's all closed!
We started with the bar since it is the big focal point. I cleared everything off the actual bar and the bar shelves. I removed the liquor bottles from the bar shelves and tried to keep it looking simple and clean with a wooden humidor, glass decanter, and 2 sets of stacked glasses.
As for the bar, I was so sad to remove my most favorite lamps but I knew that it was the right thing to do (don't worry - they aren't gone for good!). I then put 3 small pieces on each side of the bar. I went with a picture, a candle in a glass hurricane, and a clock on one side and the M on the other.
And to better fit with the Ballard DIY drapes, I relocated the chairs that were around the table (of course no before of this so use your imagination!) and moved the open back mid century chairs around the table. A simple glass bowl filled with sand and coral finishes off the dining area.

In the living portion of the room, the biggest change came from removing all of the pictures and accessories from the top of the armoire. Then I moved the couch in front of the window and placed the slipper chairs at an angle. I brought in an old lamp to go on a side table next to the couch. A vintage looking coat/hat rack adds some height to the other side of the couch. The rack was previously in the breakfast nook and worked great to catch our bags, jackets, purses but it was such an eye sore all loaded up that we moved it and plan to keep it bare! To the right of the armoire we added a square ottoman in the same fabric as the Ballard panels in the Dining area. I like how it pulls the 2 spaces together (and hides the huge surge protector!)

View from the kitchen

I love how cozy the space feels!

The rack was previously in the breakfast nook and worked great to catch our bags, jackets, purses but it was such an eye sore all loaded up that we moved it and plan to keep it bare!

The window behind the couch is actually not centered on the wall. We hung the curtain hardware centered and cover up more wall on the right hand side to even the room out.

The view from above... I never got to add rugs in here but I know they would have looked
amazing and helped to define the spaces!
PS - Don't forget to de-clutter the side of your frig, pantry, bathroom and kitchen counters, and even your shower shelves if they are visible! Having a de-cluttered house leaves potential buyers feeling that you have adequate space to store your possessions and that they will too!
Keep it Light... Tip 2
Well, here I am one day closer to the house being on the market! It's been a mess of a day thanks to both kids getting diagnosed with ear infections (Little Man simply screamed 'My ear hurts" while Little Lady chose to make her statement by refusing to sleep last night... I much prefer Little Man's method!)
Today's tip can intentionally be taken several ways.... we all need to lighten up! Obviously, for the literal meaning... don't make this a do or die issue. Yes - we all want to have a perfect house with perfectly behaved kids and a husband that is home at 5 on the dot to a gourmet meal... but it's very rarely going to happen like that! Throw the added stress of selling your house (especially in this economy) and it's almost important to remember to not overdue it!
If only I listened to my own advice! Yesterday while eating lunch for the brief 10 minutes when naps overlapped I saw the coffee table in our family room and was reminded that I REALLY wanted to do something (anything!!) to spruce it up! So what better time than the present? It's not like I have about 100 other things to do to prepare for meeting with realtors on Wednesday. And let's just say this quickie attempt at a DIY resulted in the hubby commenting "It's okay. It's a cheap Ikea Table, We can just throw it away." Umm yeah.... Fail! So save yourself the time and focus on the big stuff and not on the not quite perfect coffee table. (Note - I am not giving up on this table! I just need to work on when I have a little more time)


If only I listened to my own advice! Yesterday while eating lunch for the brief 10 minutes when naps overlapped I saw the coffee table in our family room and was reminded that I REALLY wanted to do something (anything!!) to spruce it up! So what better time than the present? It's not like I have about 100 other things to do to prepare for meeting with realtors on Wednesday. And let's just say this quickie attempt at a DIY resulted in the hubby commenting "It's okay. It's a cheap Ikea Table, We can just throw it away." Umm yeah.... Fail! So save yourself the time and focus on the big stuff and not on the not quite perfect coffee table. (Note - I am not giving up on this table! I just need to work on when I have a little more time)

The table

Modge Podge Burlap Scrapbook paper... great idea!
But you need to match up edges... not a quick project!
And now onto the real meaning... Lighting is very important in houses! You always want your home to look bright and filled with light. Natural light is the best kind if your house obliges. Ours does, but we had been blocking out lots of this super light based on the exposure our house gets. No joke - our house really cooks! So most of our windows are equipped with not only blinds or shades but also some type of curtain to block out even more sun. It makes for super cozy movie watching on the weekends but not ideal for achieving that bright look.
So what to do? The main area that we wanted to up the shine factor was in the living areas and the kitchen. We have 3 sets of large windows in those areas and all of them have 96 inch curtains (actually every window in our house aside from the Master requires that length... that was done on purpose to allow for easy changes and only needing to buy one length of drapes!)
Here is what we looked like before...


I knew that moving things around would really help to lighten things up since some of the panels are more for privacy whereas others are more for light blocking. You will notice that both the nook and family room have 12 foot ceilings while the dining room is a full two story tall room. For this reason the Dining Room always appear brighter than the family room and nook so it can better handle the heavier panels.
I started in the Breakfast Nook. Kitchens are the make and break of the house and I wanted this extension of the kitchen to look big and bright! The pattern on the drapes was not only making the space look small, it was also darkening the room. The no brain solution was the Silk panels. They allow lots of light in, are a more neutral color, and block the view into the kitchen from the outside.

So now I need to find something to put up in the Family Room. The easy solution would be the ones from the nook. So I tried those...

And found some leftover fabric..... and what do you know??? It worked! Yes, it is hanging now without me having done anything to it other than fold over the top edge and using drapery clips!

So this left just the dining room and as you probably noticed the Ikat panels made there way up to the kids loft. The colors worked perfectly upstairs and they are just the right amount of funk to adult up the kids space. I was hesitant about bringing the Ballard panels out because they really did not work with the striped shades but that issue got eliminated (to be covered in my next post) and it was settled!

And there you have it - my curtain change-around! I think that the switches really helped and you will get to see more when I show the full room shots early next week!
So what to do? The main area that we wanted to up the shine factor was in the living areas and the kitchen. We have 3 sets of large windows in those areas and all of them have 96 inch curtains (actually every window in our house aside from the Master requires that length... that was done on purpose to allow for easy changes and only needing to buy one length of drapes!)
Here is what we looked like before...

West Elm Silk Weave Panels in the Family Room

DIY Ballard Lined Panels in the Breakfast Nook

West Elm Ikat Panels in the Dining Side of the Great Room
I knew that moving things around would really help to lighten things up since some of the panels are more for privacy whereas others are more for light blocking. You will notice that both the nook and family room have 12 foot ceilings while the dining room is a full two story tall room. For this reason the Dining Room always appear brighter than the family room and nook so it can better handle the heavier panels.
I started in the Breakfast Nook. Kitchens are the make and break of the house and I wanted this extension of the kitchen to look big and bright! The pattern on the drapes was not only making the space look small, it was also darkening the room. The no brain solution was the Silk panels. They allow lots of light in, are a more neutral color, and block the view into the kitchen from the outside.

Loving how light and airy the Silk Panels look here!
So now I need to find something to put up in the Family Room. The easy solution would be the ones from the nook. So I tried those...

Okay, but not quite right.... too much pattern I think, so I kept searching...
And found some leftover fabric..... and what do you know??? It worked! Yes, it is hanging now without me having done anything to it other than fold over the top edge and using drapery clips!

Who needs curtains when you have fabric???
So this left just the dining room and as you probably noticed the Ikat panels made there way up to the kids loft. The colors worked perfectly upstairs and they are just the right amount of funk to adult up the kids space. I was hesitant about bringing the Ballard panels out because they really did not work with the striped shades but that issue got eliminated (to be covered in my next post) and it was settled!

I think that the pattern works here because of the super tall ceilings!
If you look very carefully you can see the Ikat upstairs in the loft!
And there you have it - my curtain change-around! I think that the switches really helped and you will get to see more when I show the full room shots early next week!
Subscribe to:
Posts (Atom)