
I have been spending lots of time in Baby Sissy's room trying to get organized, hospital bags packed, etc. The more time that I spent in there,the more I love the serene color scheme. It did jump out to me that I was missing a couple of accessories so I took it on myself to complete my first post bed rest project for her nursery!
Since our bedding is custom (thanks to Grandma Gigi!) I really wanted to add some pillows that pulled together the lilac and pale aqua colors. Grandma is working on 2 floor pillows using the bumper and window treatment fabric and I started work on another one.
I happened to have an old white cotton throw pillow cover from West Elm that I was no longer using. It was just screaming to be recycled! I know that it's somewhat over done but I love all of the chevron pillows on the blogs and Pinterest! And what better way to incorporate the two colors than by DIYing one!
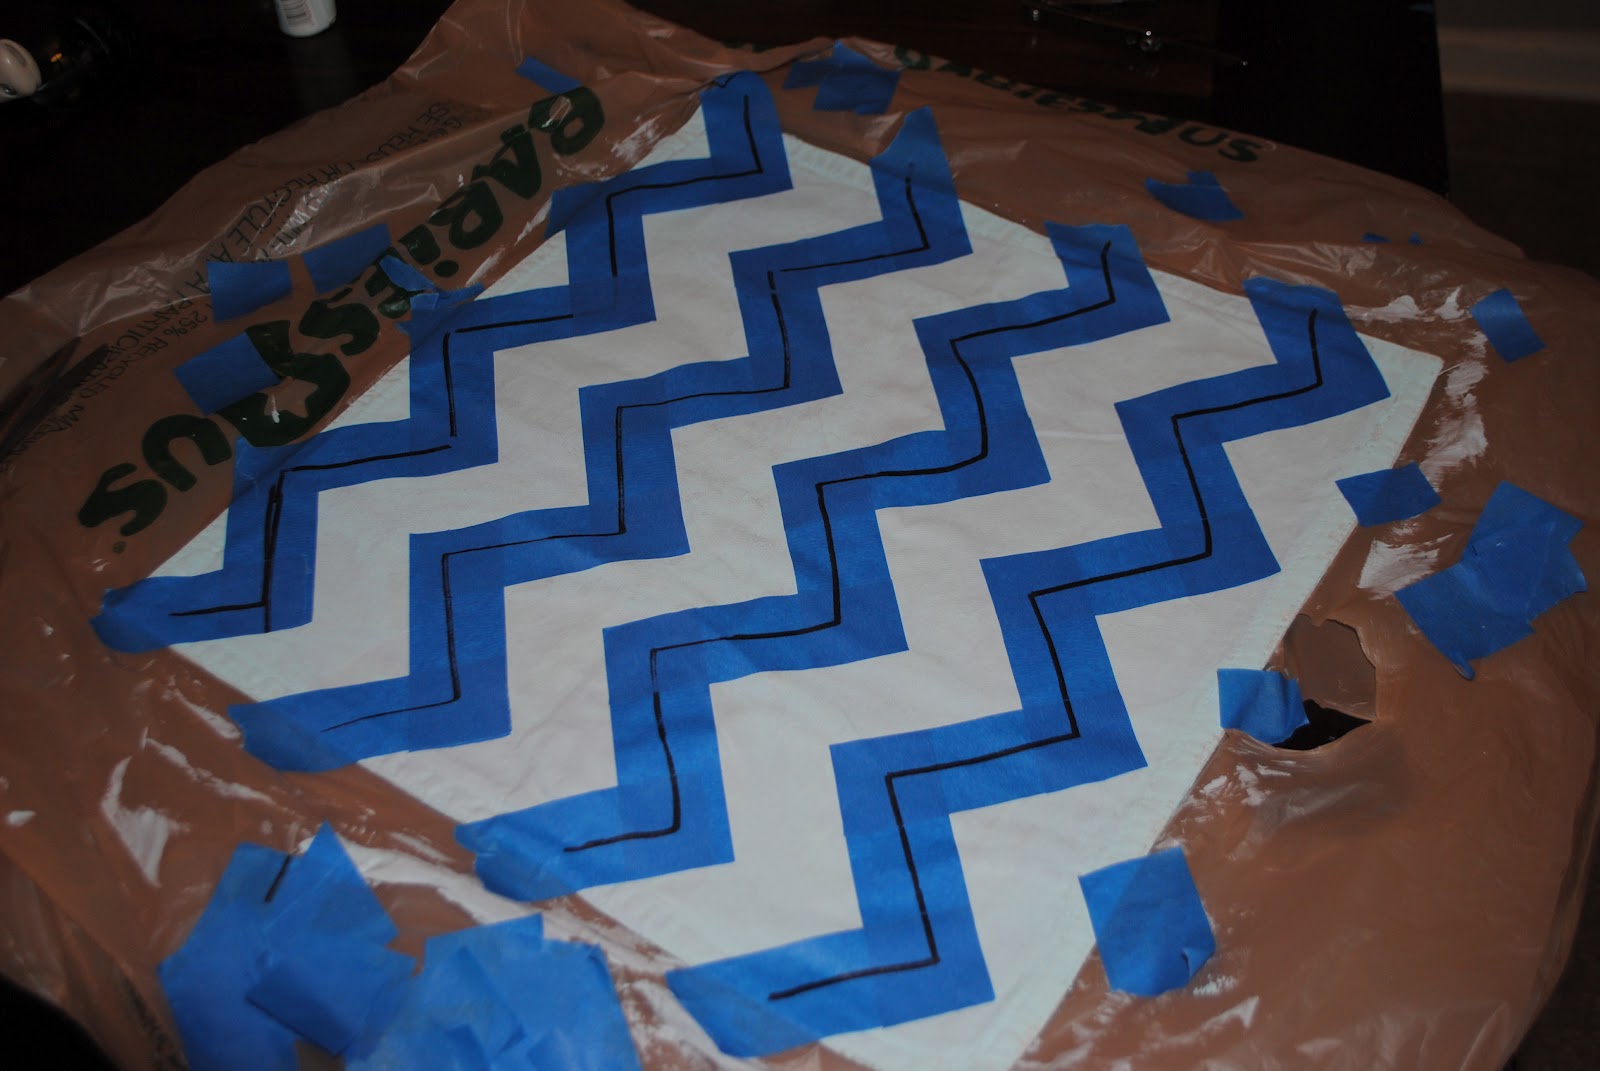
I started off by washing, drying, and ironing my pillow cover. Then I put on a coat of aqua paint across the entire front of the pillow. I chose to use Martha Stewart Multi Surface Craft paint that was being clearanced at my Michael's store. I was surprised at how well it covered and I am pretty sure you could even paint over pillow covers with a design on them. I let the paint dry for about 4 hours and then set off on the fun task of taping off the chevron pattern on the pillow. I probably went about it the slow way but in the end I got it finished!
I taped a criss cross pattern across the pillow. Then to make sure I kept and cut the right pieces, I used a Sharpie to draw on the tape that would form my chevron. Then, I got out my trusty scissors and started trimming off the excess tape. Once the tape was all cut and everything looked good, I went over the tape to make sure it was tight on the pillow. Then it was time to paint the lilac. I used a foam craft brush and tried to follow the tape lines so as to not have the paint bleed or get under the tape.


I waited just a few minutes and then carefully pulled off the tape from the pillow. I was pleasantly surprised how good it looked! The lines were pretty crisp and the paint did not bleed or run at all! I left the pillow cover to dry overnight and then I excitedly checked it out the next morning and quickly stuffed the filler into it and ran to try it out in the room...


And.... I must say that I love it!!! It really helps to pull everything together and give it an unexpected pop too! I did notice that the chair where the chevron pillow will reside could use another small lumbar size pillow but that will be covered tomorrow!
No comments:
Post a Comment