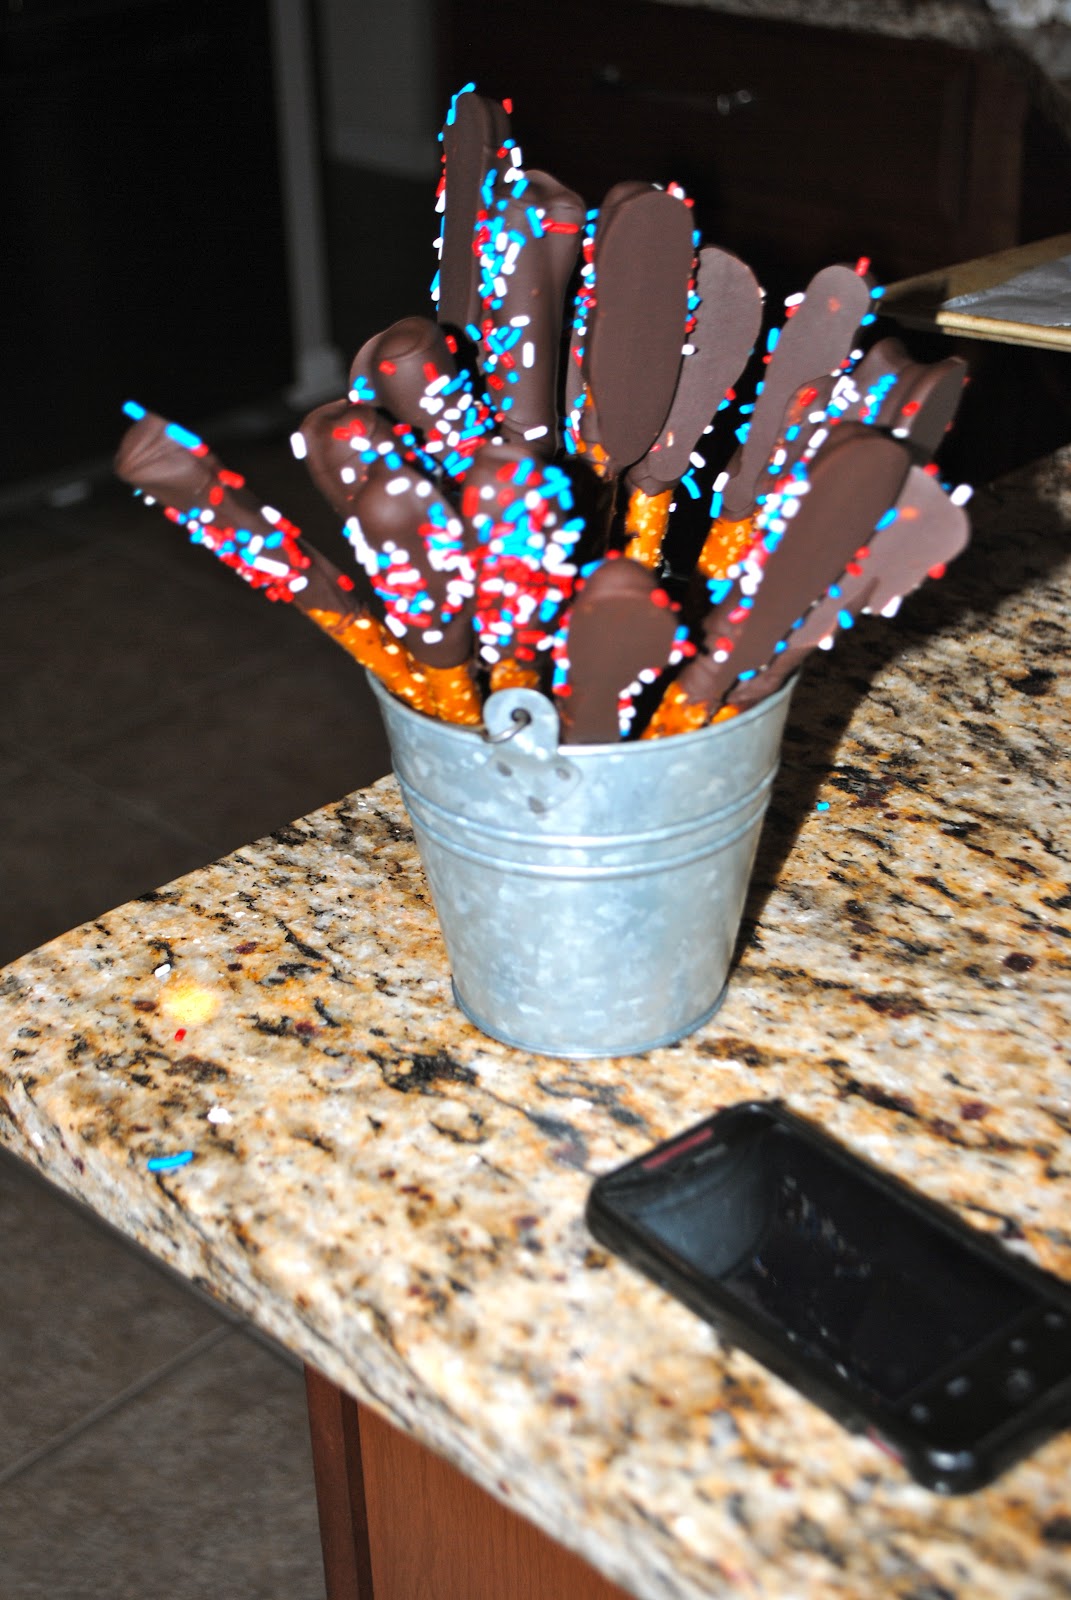
Well - its almost the 4th and our neighborhood had a great BBQ on Saturday! I knew just what I was going to bring thanks to this amazing post from Hi Sugarplum!
Patriotic Chocolate Sparklers
The best part??? Aside from the chocolate??? It was a great activity for little man to help me with! i could see this working for any holiday or even a birthday party.
3 easy steps and you are set with a dessert to impress.
1. Melt the chocolate. I went the easy route and used the Baker's Microwave Dark Chocolate version. About a minute in the micro and its ready to dip.
2. Dip the pretzels into the chocolate and lay them on a wax paper covered cookie sheet or large platter.
3. Sprinkle with the topping of your choice. I went with red, white, and blue sprinkles. Walking thru the grocery store I had a great idea to use coconut and maybe some dried cranberries too.
I chose to put the pretzels into the frig since I was in a hurry to have them set. Wait 10 minutes and you are ready to display and serve!
Sunday, July 1, 2012
Friday, June 29, 2012
Kitchen Chandelier Update
As a part of our kitchen renovation, I started cruising the internet for some new lighting options. We were looking for a chandelier to hang over our table in the breakfast nook and also for 2-3 pendant lights to hang over our island (these were currently recessed lights).
I was really struggling to find something that I liked that wasn't going to cost me a fortune (the story of my life!). Then one day, I hopped on Overstock. I was floored at all of the great lighting options and the GREAT prices! Lots of them looked just like the lights I had seen at Pottery Barn or other retailers for substantially less. But because I needed to purchase at least 3 lights, these were still above my budget. I happened upon 2 potential chandeliers and decided to just order them and see what they looked like in real life.
The One we Sent Back
Our Overstock Chandelier
The first one was more expensive and it was actually really small in person. The second one was really big and it was a different finish than what it looked like on the web. It was actually a brushed nickel with portions of the chandelier in a matte black and then the glass was topped with more of a chrome finish. The finishes were a deal breaker for me but the bones of the piece were good so I decided to try my hand at making some changes to it!
The before:
So after the hubby lovingly hung the chandelier.... I waited until he was at work the next day, shut off the electricity, and took it down to work some magic on it!
First - I taped off the wiring on the chandelier, the glass, and the actual area where the light bulbs go. Its hard to see but the piece that actually holds the light bulb was originally black too. Luckily - these are just housings for the wiring and slip right off. That was the first piece I painted. They went from black to white thanks to a quick couple of coats of spray paint.
And then the real transformation began! I set up a broom across 2 patio chairs in the very back of our yard and hung the chandelier out there so I could get to work with some more spray paint.
I did several base coats of the Hammered Dark Bronze color and then a light dusting of the Hammered Silver to give it a more flecked and worn look. I toyed with taping off the glass and spraying that too but I ended up using QTips and dabbing the color on following spraying some paint onto a paper plate. Yes - I am really creative!
After a quick dry time - it was back inside and up it went to see how I did! I was pleasantly surprised with how much of a difference a little paint can make! It now has a more vintage feel than than the super modern look when it was black. I also really love how painting the pieces that hold the light bulbs now make it seem like these are candles! The white is the perfect contrast to the dark finish! The icing on the cake for me was that since the color was sprayed on I knew that I could match whatever pendant lights I finally found! (Ironically - this was a moot point to be covered on another post!)
And here are the afters!
I was really struggling to find something that I liked that wasn't going to cost me a fortune (the story of my life!). Then one day, I hopped on Overstock. I was floored at all of the great lighting options and the GREAT prices! Lots of them looked just like the lights I had seen at Pottery Barn or other retailers for substantially less. But because I needed to purchase at least 3 lights, these were still above my budget. I happened upon 2 potential chandeliers and decided to just order them and see what they looked like in real life.
The One we Sent Back
Our Overstock Chandelier
The first one was more expensive and it was actually really small in person. The second one was really big and it was a different finish than what it looked like on the web. It was actually a brushed nickel with portions of the chandelier in a matte black and then the glass was topped with more of a chrome finish. The finishes were a deal breaker for me but the bones of the piece were good so I decided to try my hand at making some changes to it!
The before:
So after the hubby lovingly hung the chandelier.... I waited until he was at work the next day, shut off the electricity, and took it down to work some magic on it!
First - I taped off the wiring on the chandelier, the glass, and the actual area where the light bulbs go. Its hard to see but the piece that actually holds the light bulb was originally black too. Luckily - these are just housings for the wiring and slip right off. That was the first piece I painted. They went from black to white thanks to a quick couple of coats of spray paint.
And then the real transformation began! I set up a broom across 2 patio chairs in the very back of our yard and hung the chandelier out there so I could get to work with some more spray paint.
I did several base coats of the Hammered Dark Bronze color and then a light dusting of the Hammered Silver to give it a more flecked and worn look. I toyed with taping off the glass and spraying that too but I ended up using QTips and dabbing the color on following spraying some paint onto a paper plate. Yes - I am really creative!
After a quick dry time - it was back inside and up it went to see how I did! I was pleasantly surprised with how much of a difference a little paint can make! It now has a more vintage feel than than the super modern look when it was black. I also really love how painting the pieces that hold the light bulbs now make it seem like these are candles! The white is the perfect contrast to the dark finish! The icing on the cake for me was that since the color was sprayed on I knew that I could match whatever pendant lights I finally found! (Ironically - this was a moot point to be covered on another post!)
And here are the afters!
Thursday, June 28, 2012
A Kid Friendly Wall Display
Little Man LOVES to color and produces masterpieces on a daily basis! I love for him to be able to see his handiwork displayed but with a stainless fridge (and a clutter free OCD mom) I needed to find somewhere to hang his work that wasn't front and center.
We have a long and narrow closet right off the kitchen that was our catch all for junk and storage. I got a wild hair one day and cleaned it out. After tossing/reorganizing/etc I was left with an adorable little play space! I have some more plans to further improve on the space but for the meantime its a great place to keep the kiddo toys and for Little Man to play and see his art displayed. I was looking to find a cheap and easy way to make the space more colorful too!
This is my view from the kitchen sink!
Little Man playing!
I came up with this super easy art display! So easy - that I again did not take pictures until the end result!
Bouncy Ball Wall Display
Supplies:
A Package of brightly colored rubber bouncy balls
A Package of Wooden Clothespins
String
Nails
Hammer
Hot Glue Gun
A Level
The hardest part of this project for me was the measuring! I measured out the total length of the wall that I wanted to cover and then divided it into equal portions. For me - that was 7 balls and 6 sections of string between them. I then used a level and measuring tape to mark out the places on the wall where I needed the nails placed. And then I hammered the nails into the wall.
I then took the string and knotted it around the first nail. I knew that I wanted the string to be loose and hang down a bit between the balls. I used that first section as a guide for the rest of the string sections and just knotted the string at that increment 7 times in the string. Then I placed the knots around each of the nails.
Now for the fun part! I used a nail to make a small hole in 7 balls. Using my hot glue gun, I placed a small dab of glue on the ball and quickly stuck it to the nail in the wall and held it there briefly while the glue set. Repeat times 7 and you are finished!
I chose to hang some Letter flash cards as well and we switch them out so Little Man also gets to learn while playing!
Sunday, June 24, 2012
High Gloss Finish
One of the things that I really liked about my inspiration dressers was the super shiny, high gloss finish that they both had. I think that it makes the piece really stand out and look much less painted at home.
I was hoping to accomplish this using the semi gloss paint that I purchased and our poly coat. Unfortunately it wasn't as glossy as I would have liked. On a side note, I am super impatient and doing a better job of sanding between coats and before the priming and painting would have helped alot but I get so focused on the end result I sometimes hurry thru the steps!
So, I did a quick internet search and found this miracle working spray paint.
So after my single coat of primer, multiple coats of paint, and single layer of poly... I applied about 3 coats of the Clear Lacquer Spray. And I have to say wow! What a difference!
It is best to apply in a very well ventilated space (ideally outside) because it sure is strong but the results are outstanding! It totally covered all of the brush strokes and imperfections.
Check out my after shots... you can almost see a reflection its so shiny!
I was hoping to accomplish this using the semi gloss paint that I purchased and our poly coat. Unfortunately it wasn't as glossy as I would have liked. On a side note, I am super impatient and doing a better job of sanding between coats and before the priming and painting would have helped alot but I get so focused on the end result I sometimes hurry thru the steps!
So, I did a quick internet search and found this miracle working spray paint.
So after my single coat of primer, multiple coats of paint, and single layer of poly... I applied about 3 coats of the Clear Lacquer Spray. And I have to say wow! What a difference!
It is best to apply in a very well ventilated space (ideally outside) because it sure is strong but the results are outstanding! It totally covered all of the brush strokes and imperfections.
Check out my after shots... you can almost see a reflection its so shiny!
Saturday, June 23, 2012
Loving the Trolley!
And finally some pics in the room! I love the pop of color and how much cleaner it looks vs the old entertainment center!
Don't worry I am not subjecting my daughter to the Cars movie quite yet! But this was a project that ended up giving both kids something to be excited about!
The before shot...
And after!!!
There will be more shots once we have a sunny day... its been raining like crazy and no natural light does not do this justice.
In the meantime - this is what I was working on...
Sunday, June 17, 2012
Father's Day DIY Frame
Happy Father's Day! Its been a great weekend here :) Little Man and Baby Sis got their dad an air compressor and the hubby was so excited! Power tools are the way to a man's heart!
But I wanted to also get him something a little more sentimental too. We have yet to have professional photos done with the 2 kids so I dressed them up one morning and sat that on the couch to try and catch a couple of nice candid shots. Turns out - we got a few really good ones! So what would be a better gift than a framed pic of his two kiddos?
I had a so so Target clearance frame that I decided to just spray with Chalkboard paint. Super easy - 2 light coats and a night to sit and we were ready to go! Since the entire frame was pastel pink I then flipped the frame over and gave it a coat of Gloss Black on the back to make a bit more finished looking. A quick run over with chalk and we were in business!
PS - The pulls are on and looking OUTSTANDING! Here is a sneak peak until its inside and styled!
But I wanted to also get him something a little more sentimental too. We have yet to have professional photos done with the 2 kids so I dressed them up one morning and sat that on the couch to try and catch a couple of nice candid shots. Turns out - we got a few really good ones! So what would be a better gift than a framed pic of his two kiddos?
I had a so so Target clearance frame that I decided to just spray with Chalkboard paint. Super easy - 2 light coats and a night to sit and we were ready to go! Since the entire frame was pastel pink I then flipped the frame over and gave it a coat of Gloss Black on the back to make a bit more finished looking. A quick run over with chalk and we were in business!
PS - The pulls are on and looking OUTSTANDING! Here is a sneak peak until its inside and styled!
Wednesday, June 13, 2012
DIY Chalkboard Labels
Lately I have been on this crazy organization kick... I am pretty sure it's because I am home all day so I really get to see how unorganized our house is times 24/7! Additionally there is a slight chance that we might be putting our house up for sale and to make that happen we really need to get the house ready and organizing is step 1 for me.
So this week - I started off on a long list of projects. They aren't 'sexy' but they are necessary! The garage, hubby's work bench, my craft/computer armoire, our utility cabinet in the garage, kids closets, the loft shelves, the pantry, and the kitchen cabinets. It's a lot but I have already made some progress.
Today I conquered my armoire and of course - no before picture but let's just say it was very cluttered and all of my supplies were in one large plastic bin. It might it very challenging to grab a paint brush or whatever supply I was looking for. So while I was at Costco yesterday I found a great deal on the shoe sized plastic containers for less than $1 each. I bought 14 of them! I used six for my supplies and the remainder are being used across the house for other projects and posts.
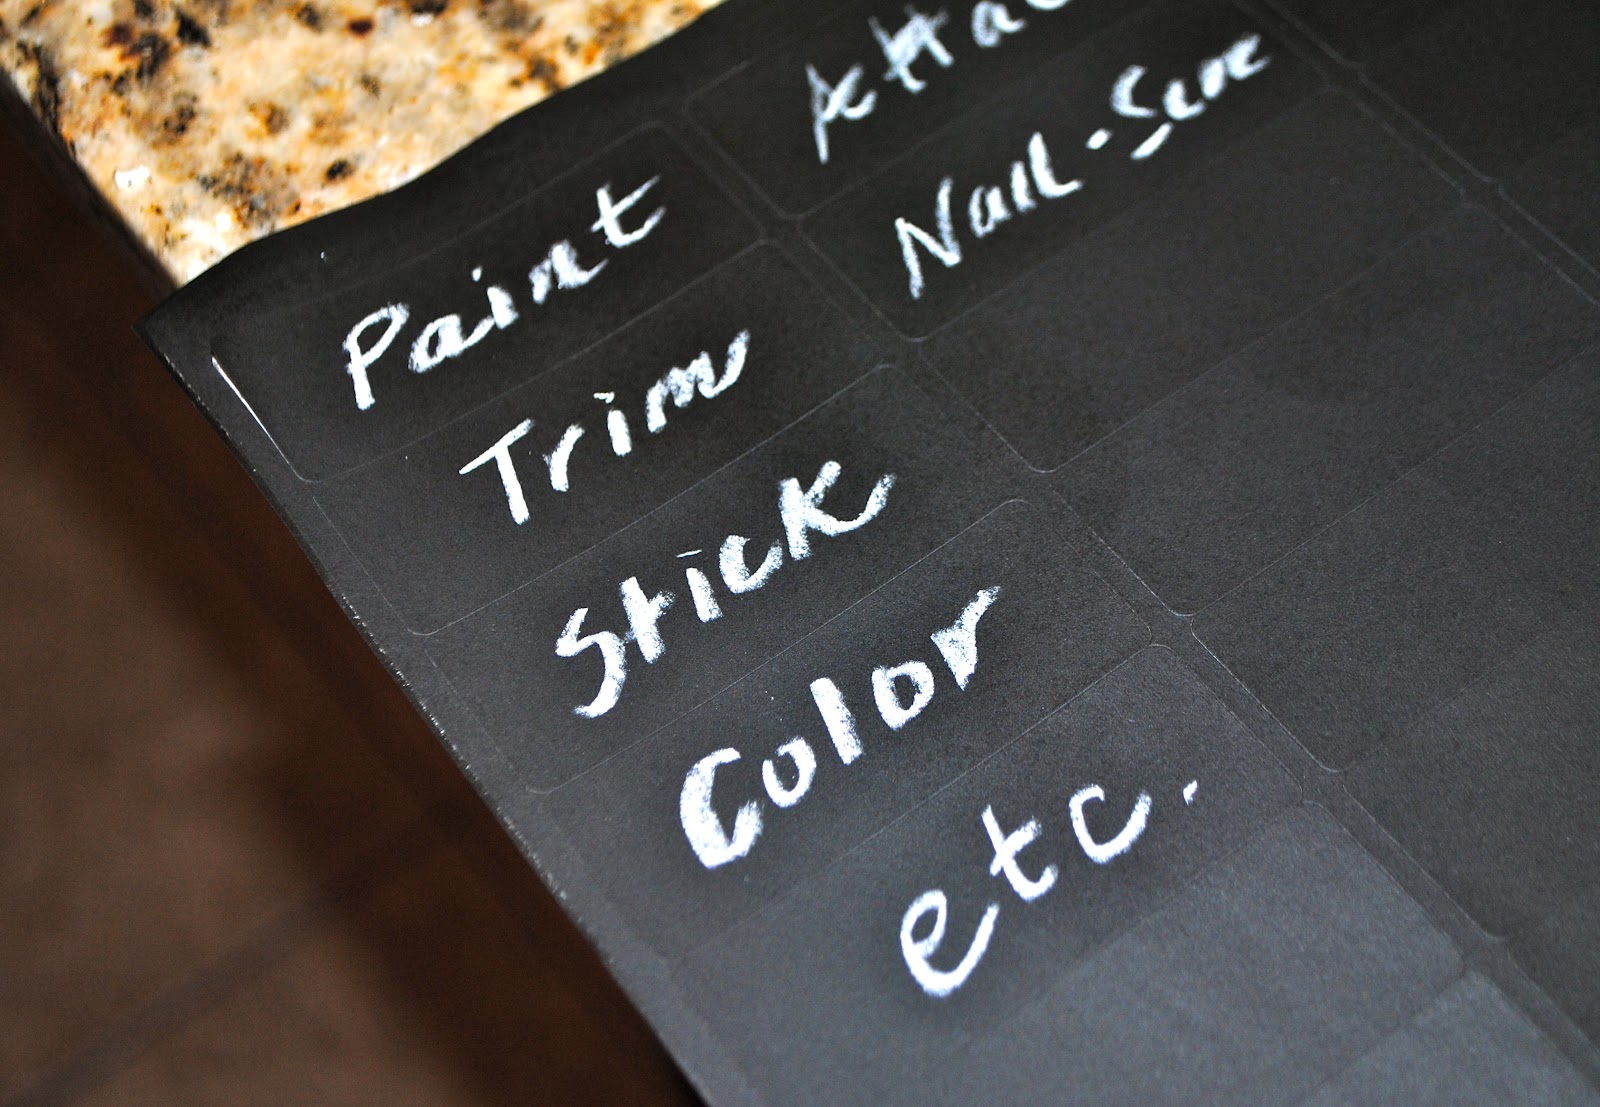
The one thing that I did not buy were cute labels for the containers. I knew that I needed something but its such a pain to drag both kids into Michael's just to look at what they have. So as I was cleaning out some of the computer supplies I cam across several Avery Labels from Christmas cards a few years ago. I thought why not.... I have a can of chalkboard spray paint maybe I can make chalkboard labels. And what do you know - SUCCESS!
Supplies:
1 can of Chalkboard Spray Paint
1 page of Avery Labels
Some chalk
I literally just sprayed 2 thing coats of the chalkboard paint onto the labels letting it dry for about an hour between coats.
I then waited about 3 hours before applying the labels to the containers and writing on them.
And that's it!
Check out the finished product. I still have a bit more work on the armoire but its more of decor than organization.
PS - I love them so much that I added a label to the galvanized bucket I use to hold my thank you cards and stamps!
PPS - Shipping confirmation on the RH pulls shows a delivery date of tomorrow. I am so excited!
So this week - I started off on a long list of projects. They aren't 'sexy' but they are necessary! The garage, hubby's work bench, my craft/computer armoire, our utility cabinet in the garage, kids closets, the loft shelves, the pantry, and the kitchen cabinets. It's a lot but I have already made some progress.
Today I conquered my armoire and of course - no before picture but let's just say it was very cluttered and all of my supplies were in one large plastic bin. It might it very challenging to grab a paint brush or whatever supply I was looking for. So while I was at Costco yesterday I found a great deal on the shoe sized plastic containers for less than $1 each. I bought 14 of them! I used six for my supplies and the remainder are being used across the house for other projects and posts.
The one thing that I did not buy were cute labels for the containers. I knew that I needed something but its such a pain to drag both kids into Michael's just to look at what they have. So as I was cleaning out some of the computer supplies I cam across several Avery Labels from Christmas cards a few years ago. I thought why not.... I have a can of chalkboard spray paint maybe I can make chalkboard labels. And what do you know - SUCCESS!
Supplies:
1 can of Chalkboard Spray Paint
1 page of Avery Labels
Some chalk
I literally just sprayed 2 thing coats of the chalkboard paint onto the labels letting it dry for about an hour between coats.
I then waited about 3 hours before applying the labels to the containers and writing on them.
And that's it!
Check out the finished product. I still have a bit more work on the armoire but its more of decor than organization.
PS - I love them so much that I added a label to the galvanized bucket I use to hold my thank you cards and stamps!
PPS - Shipping confirmation on the RH pulls shows a delivery date of tomorrow. I am so excited!
Subscribe to:
Posts (Atom)